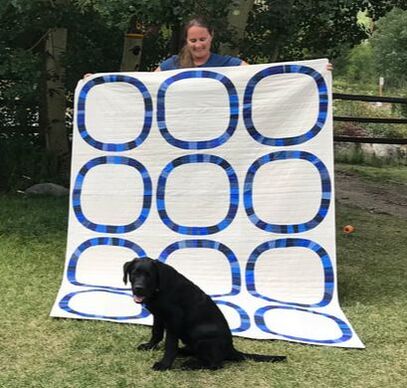
 If you follow me on Instagram, then you've seen lots of this quilt lately. You've also heard about my troubles quilting it on my sewing machine. However I have persevered and trouble-shot my issues and have both a new sewing machine and a finished quilt! 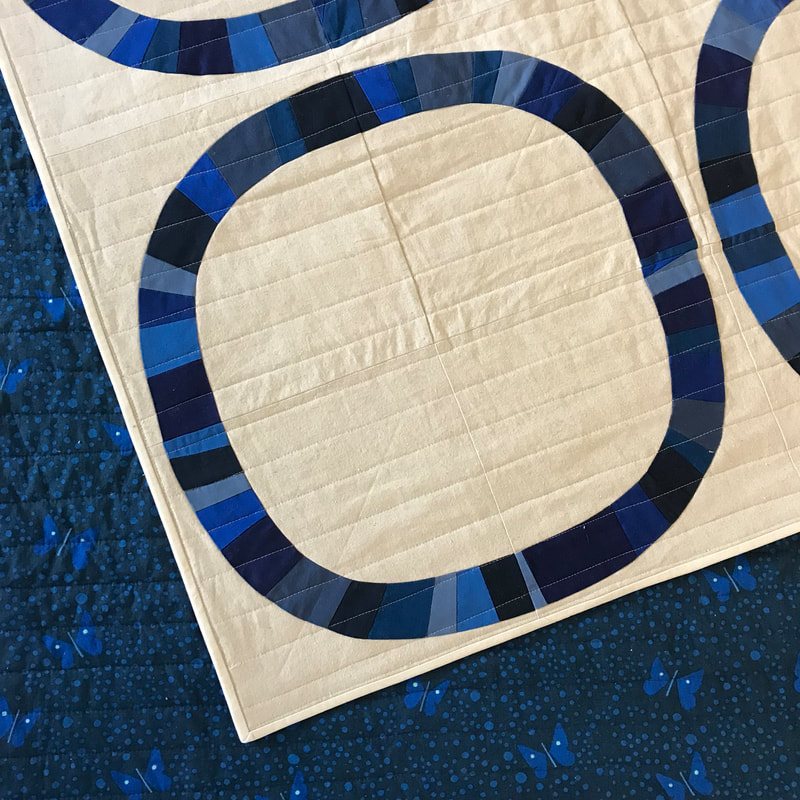 A little quilt back-story: I made my first Free-wheeling Single Girl quilt in 2016. (Click here to see it.) I started that quilt at Sewtopia Atlanta in 2016 when Denyse Schmidt was one of the teachers (it's her pattern). I really enjoyed making the pattern (you've gotta love large-scale blocks) and have been wanting to make another. I have also been wanting to sew with Robert Kaufman's Essex Linen AND...have been in love with mixing tones of one color. I seem to either do scrap quilts, or do mono-choromatic or two-color quilts. So at Sewtopia 2019 (Salt Lake City 3) I started another blue single girl quilt and this time I used Natural Essex Linen (something I had been meaning to try) and several blue solid fabrics from my stash. 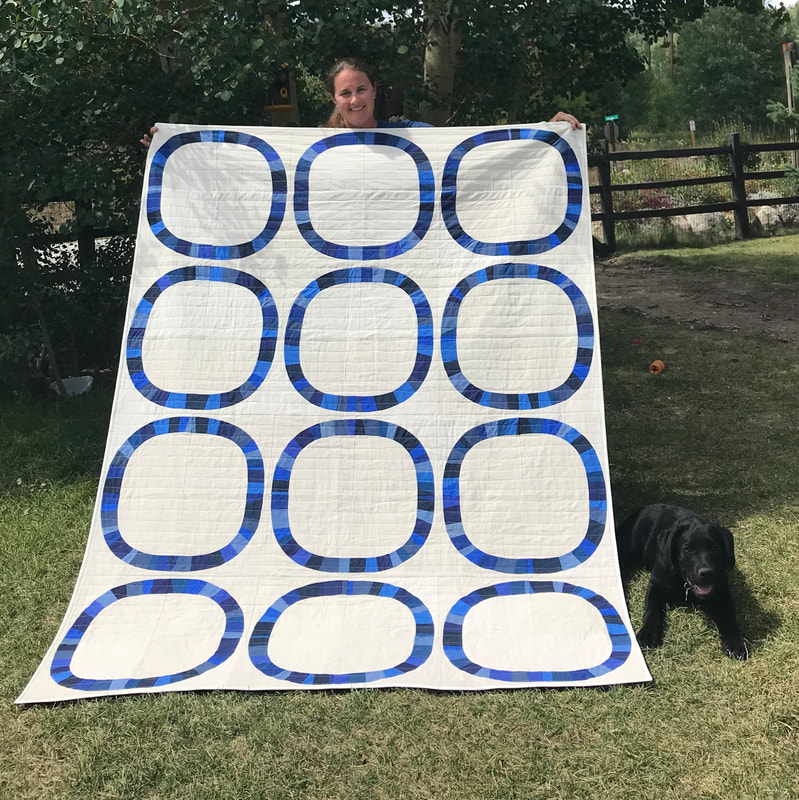 Fast forward 4 months and I have a finished quilt! I made the "twin" size, quilted it with straight lines that are about 1 1/2" apart, and backed it with a favorite old Lizzy House butterfly print that I was able to find on Etsy (again you can see more about that on Instagram). 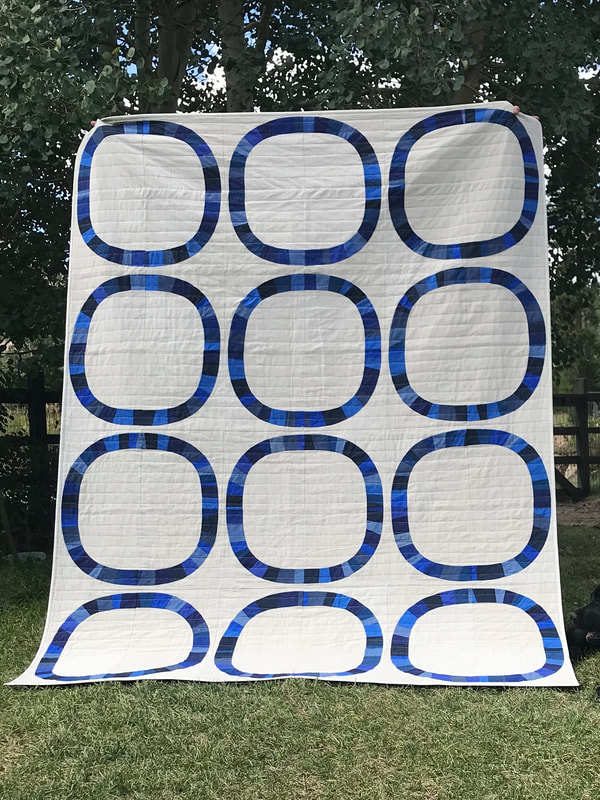
0 Comments
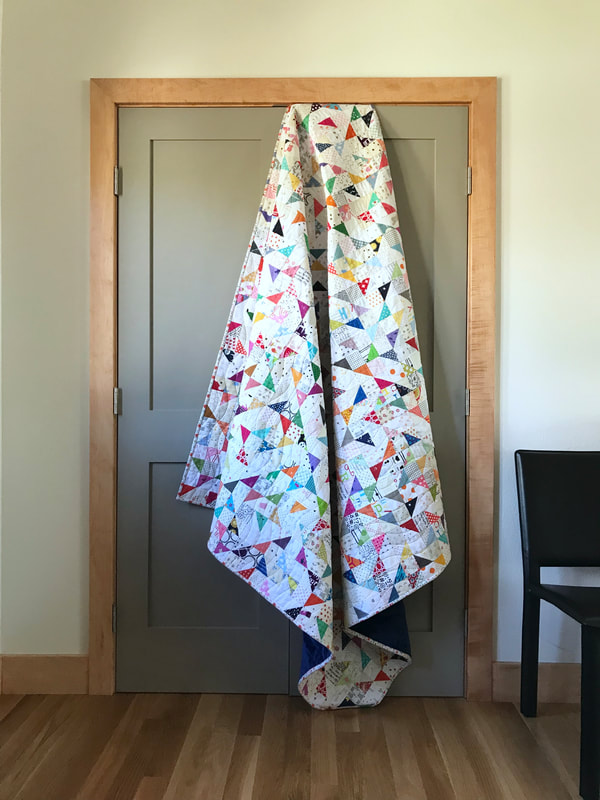 The past week I finished up another scrap quilt! This quilt was started by all of the half-square triangle (HST) trimmings from my Scrappy Goose Quilt. A little over a year ago I pieced together the original scrap HST blocks from that quilt, but when it was done it made a pretty small quilt. So I set it aside with the idea that sometime (in the near future) I would make more HST blocks and make the quilt bigger. Fast forward 14 months and the larger HST Chaos quilt is done! 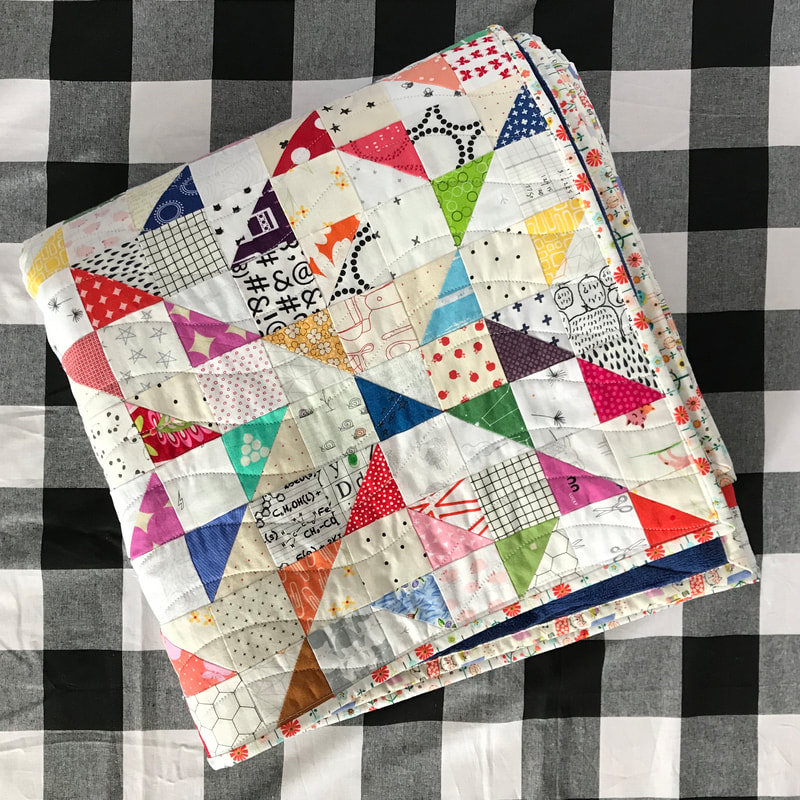 Lora from Quilts by Grace quilted this for me using a modern wave pattern, with the lines spaced around 1 1/2" apart. I've used this quilt pattern on several quilts lately and really like the texture that it creates, and it's unobtrusiveness. I bound the quilt with two multi-color small scale prints, and backed it in "Mallard" blue minky. 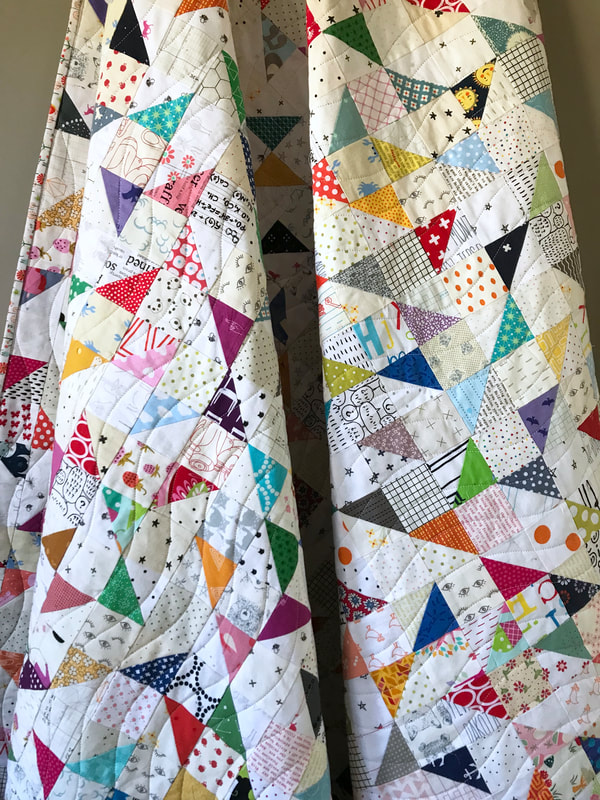 This quilt contains 1,024 squares and finished at 64" square. You can see more pictures at #hstchaos. A few people have asked, so I've written up a short tutorial on how I made this quilt. You can find it here, and also on my tutorials page. 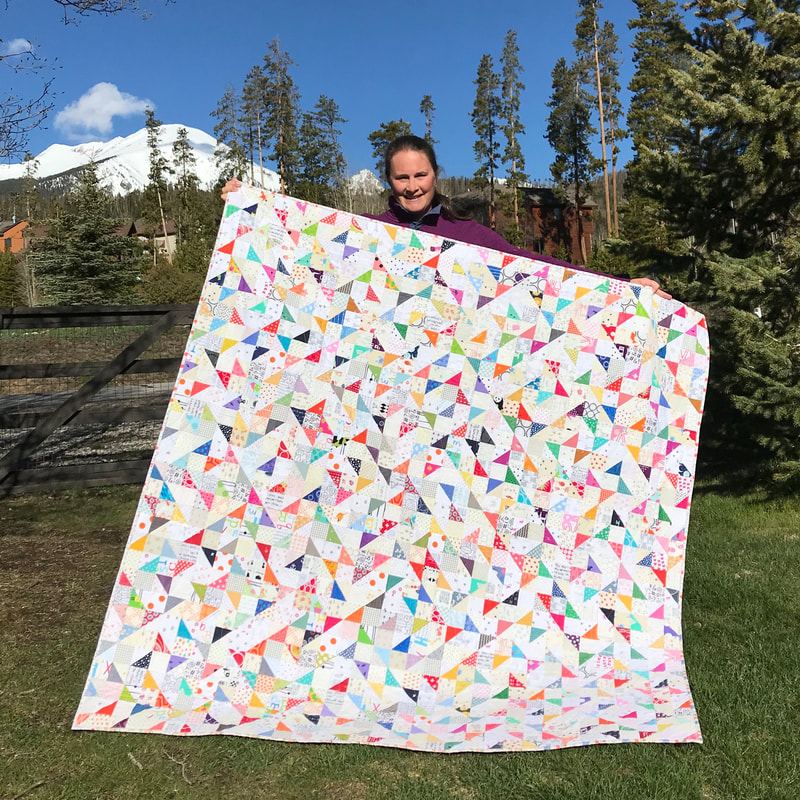 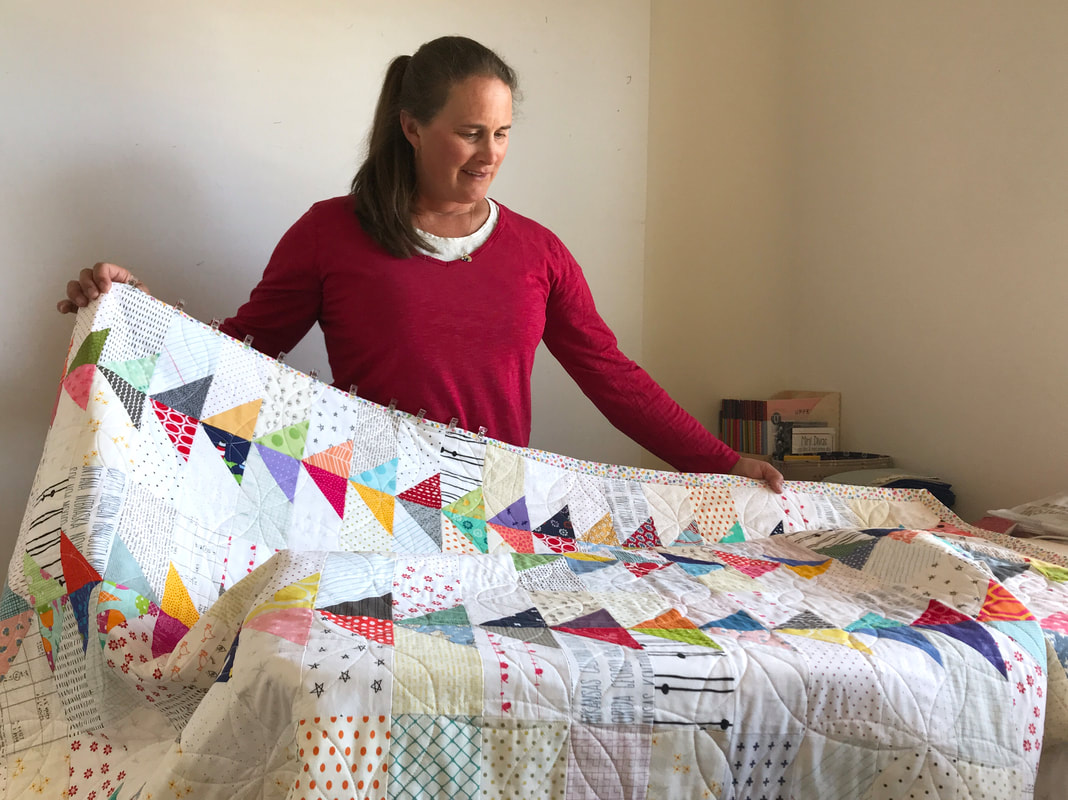 Two years ago I saw the quilt below by Christa Watson and loved it!
My Scrappy Goose Quilt was started in the summer of 2017 when I was still in a hard cast and on crutches after surgery on my ankle. I was unable to stand on my bad ankle, so I cut all the background rectangles sitting on the floor of my living room, and then hopped back and forth on my one good foot to lay the blocks out on my design wall. 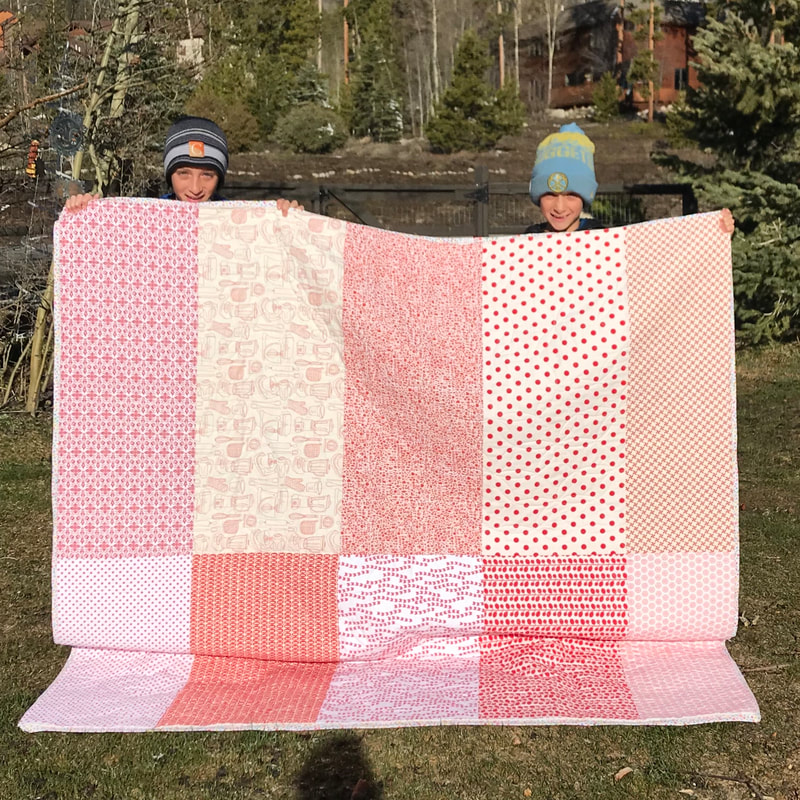 I got the top pieced shortly after I started it, pieced a backing for it a few months later, and then it hung in a corner for about 18 months before I decided to take it to my local long-arm quilter: Quilts by Grace. For the backing, I pulled 10 half-yard cuts of "medium-volume" fabric from my stash and pieced them together. Over the year I've acquired several cuts of red & white prints that have too much going on in them to call them "low-volume," but they're too choppy to call them "blenders," and I just wasn't using them. So this backing was the perfect place to put them. 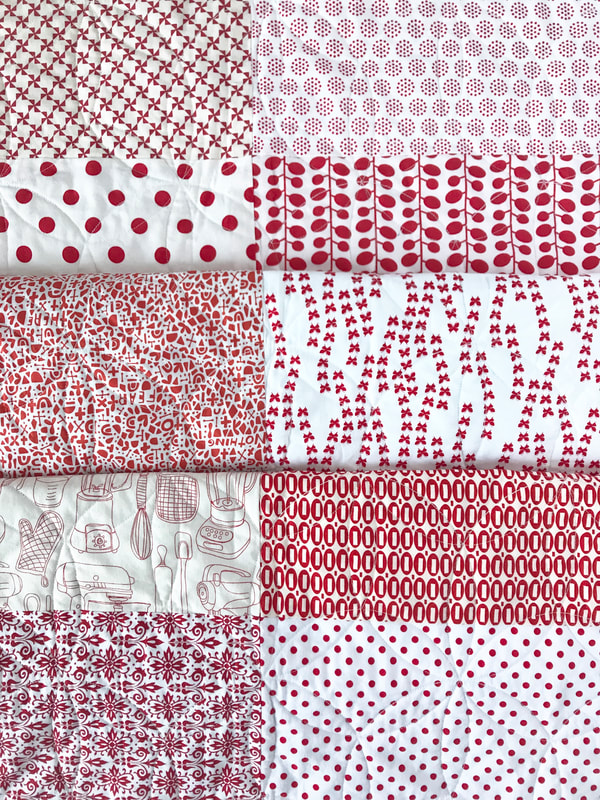  Wow is it ever a treat to have someone else quilt a quilt for me! I think that basting is my least favorite part of making a quilt - therefore a lot of quilt projects stall out once I get the top completed. Once I had the quilt quilted, it was only a week or so before I put this cute binding on. 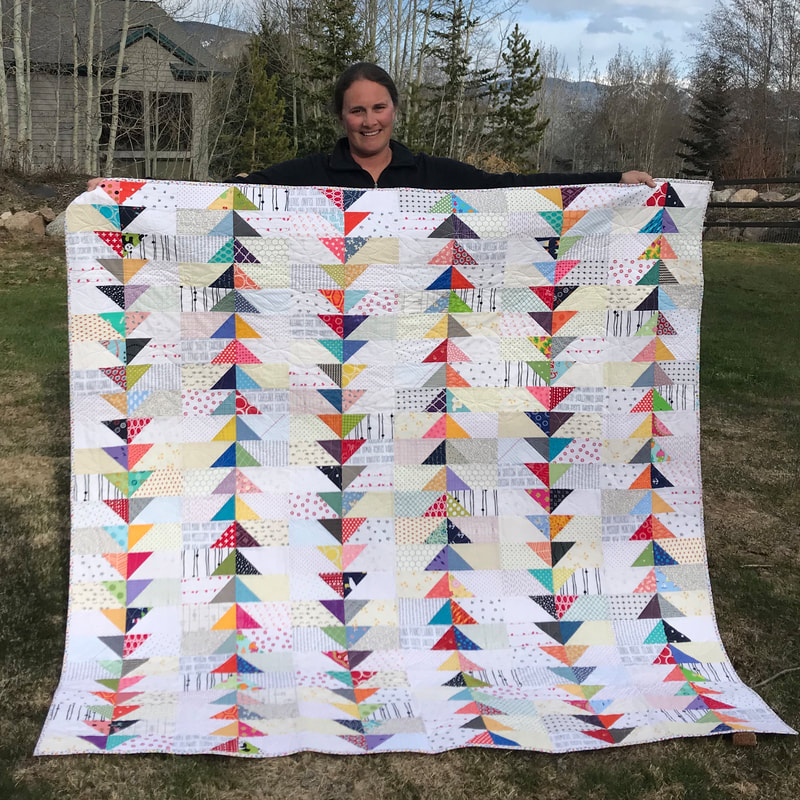 This quilt finished at 72" square and, as I mentioned on Instagram, I am keeping this guy for myself. For more pictures of this quilt, please check out #scrappygoosequilt.
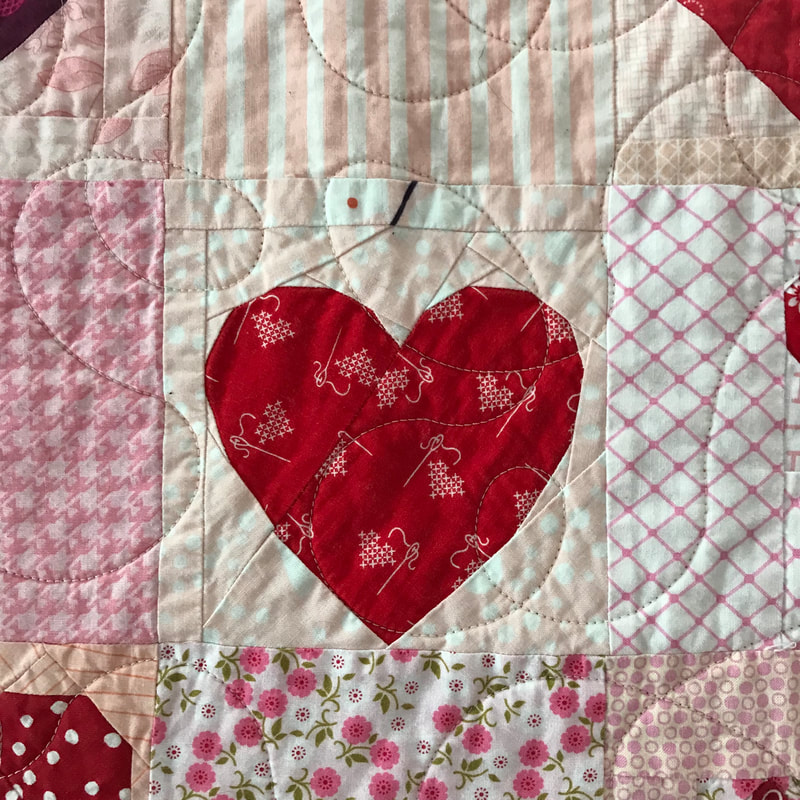
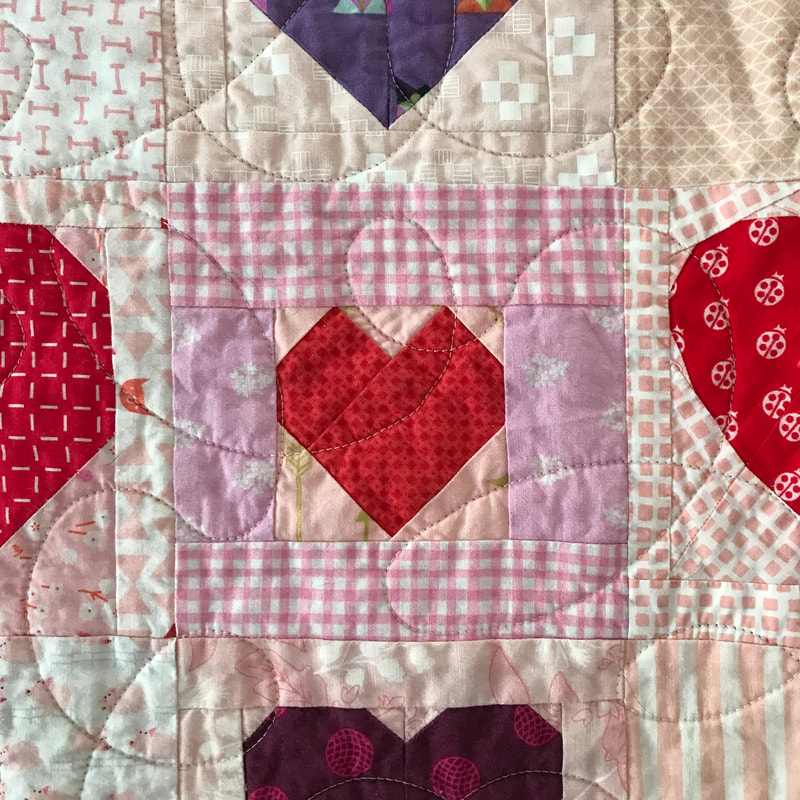
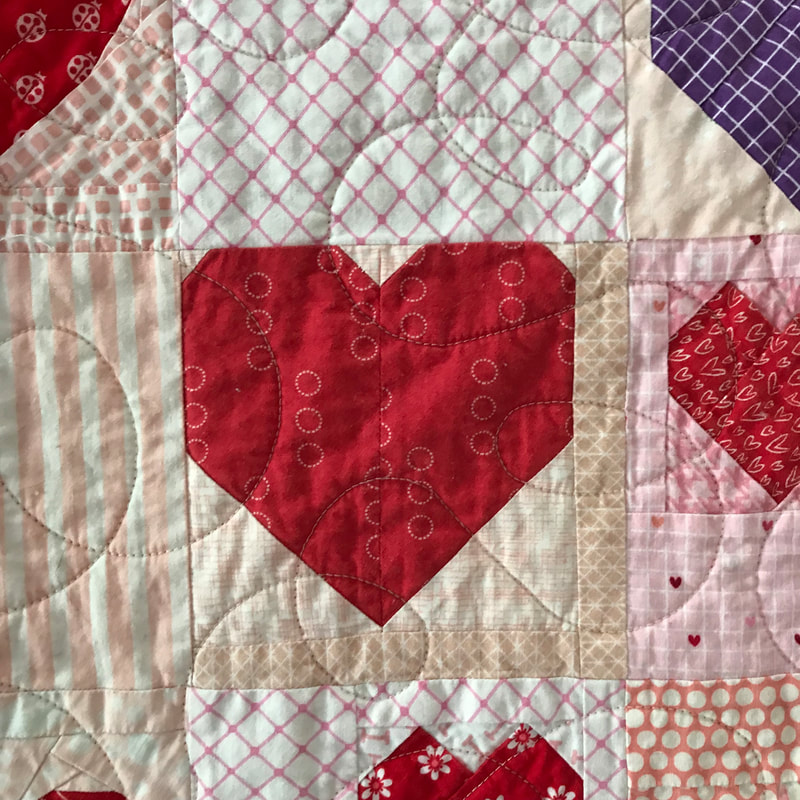
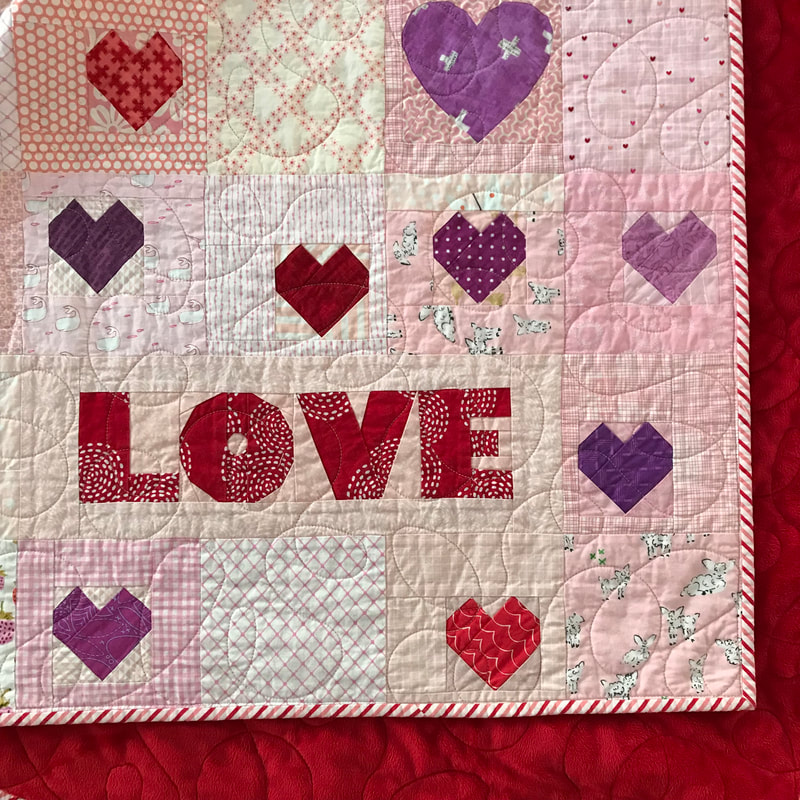 I finished this quilt a few weeks ago but never had a quilt-holder around during daylight hours. Until Sunday! So here it is: my 2018 I Wish I Could Go Too Traveling Quilt Bee (round 2). (aka "It's Raining Hearts.") For the second round of our traveling quilt bee, I asked people to make small 3-5" heart blocks in red or purple on a light/medium pink background. People were also welcome to send along "blank" pieces of background fabric. You can read my kick-off post here. This quilt was a little different in that I asked people to make multiple small blocks, but not to assemble them. For my "starter block" I did assemble my hearts to make a mini mock version of what my quilt would look like when it was all done. When my quilt came back to me at the end of traveling through the bee participants, I made the mock quilt panel in to a pillow. You can see that project here.
Once I got the blocks back, I "built them out" so that they were all 6 1/2" square and laid them out interspersed rather randomly with blank squares of fabric. In the pics above you can see places where I added fabric to littler blocks to make them 6 1/2" square. I had fun trying to match (or at least coordinate) fabrics to the background fabrics in each block. 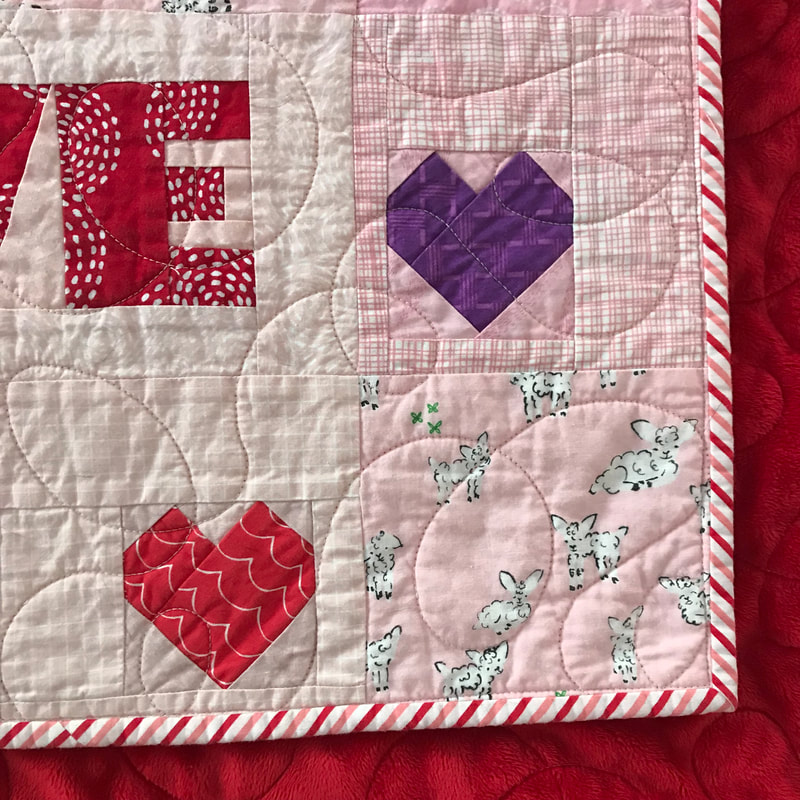 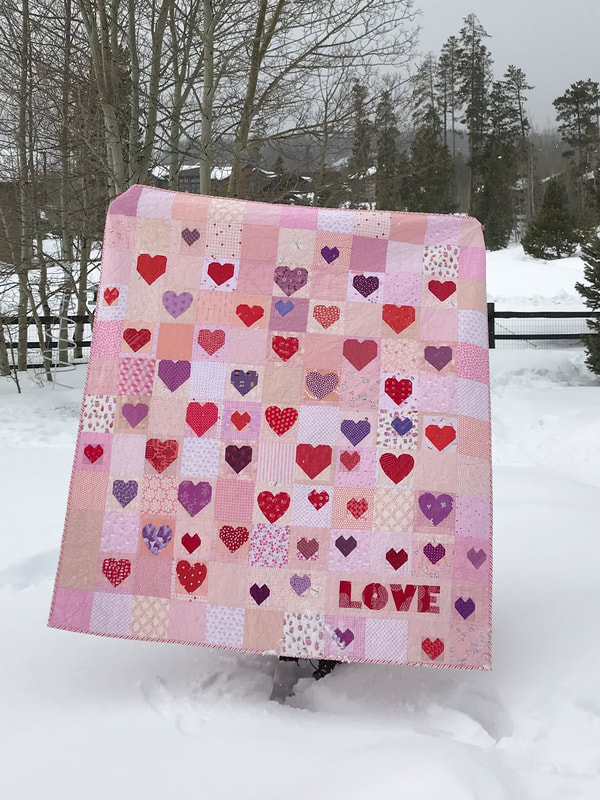 This quilt finishes about 66" x 72." I backed it with minky and had my local long-arm quilter quilt it with an edge-to-edge swirl panto pattern. It has been living on our couch for about a month now and I absolutely love snuggling under it at night. You can check out #itsrainingheartsquilt for more in-progress pics. Thank you to all the ladies who helped contribute blocks for my quilt: Jen, Kristin, Kayla, Kristy, Steph, Rebecca, & Jackie!
Tonight I submitted and paid my last Colorado sales tax return for a while, I hope. Following that, I went to my Etsy store to essentially close it. After 10 years, I've decided that it is no longer worth my time to spend time (and money) posting things to sell on Etsy. As many crafty types know, it is very difficult to try to sell handmade items for a fair price, and going forward I'm going to spend my efforts on crafting for my own pleasure.
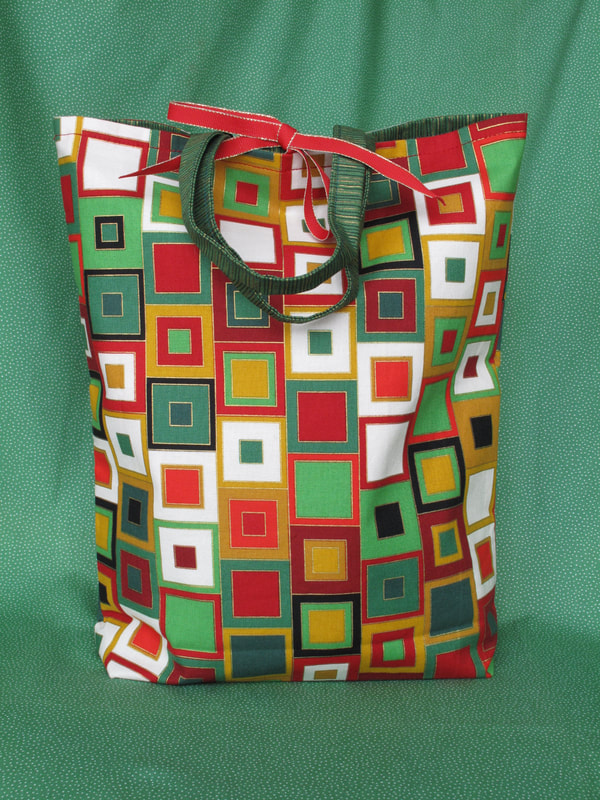
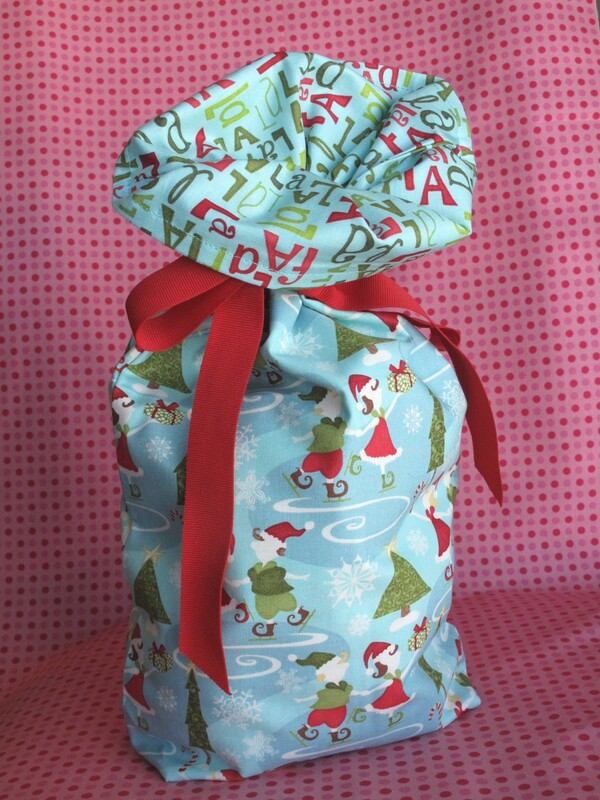
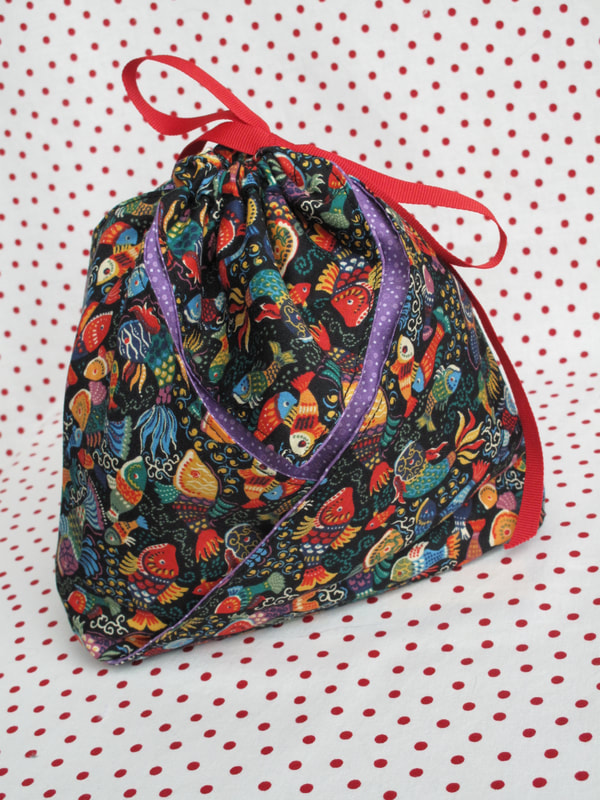
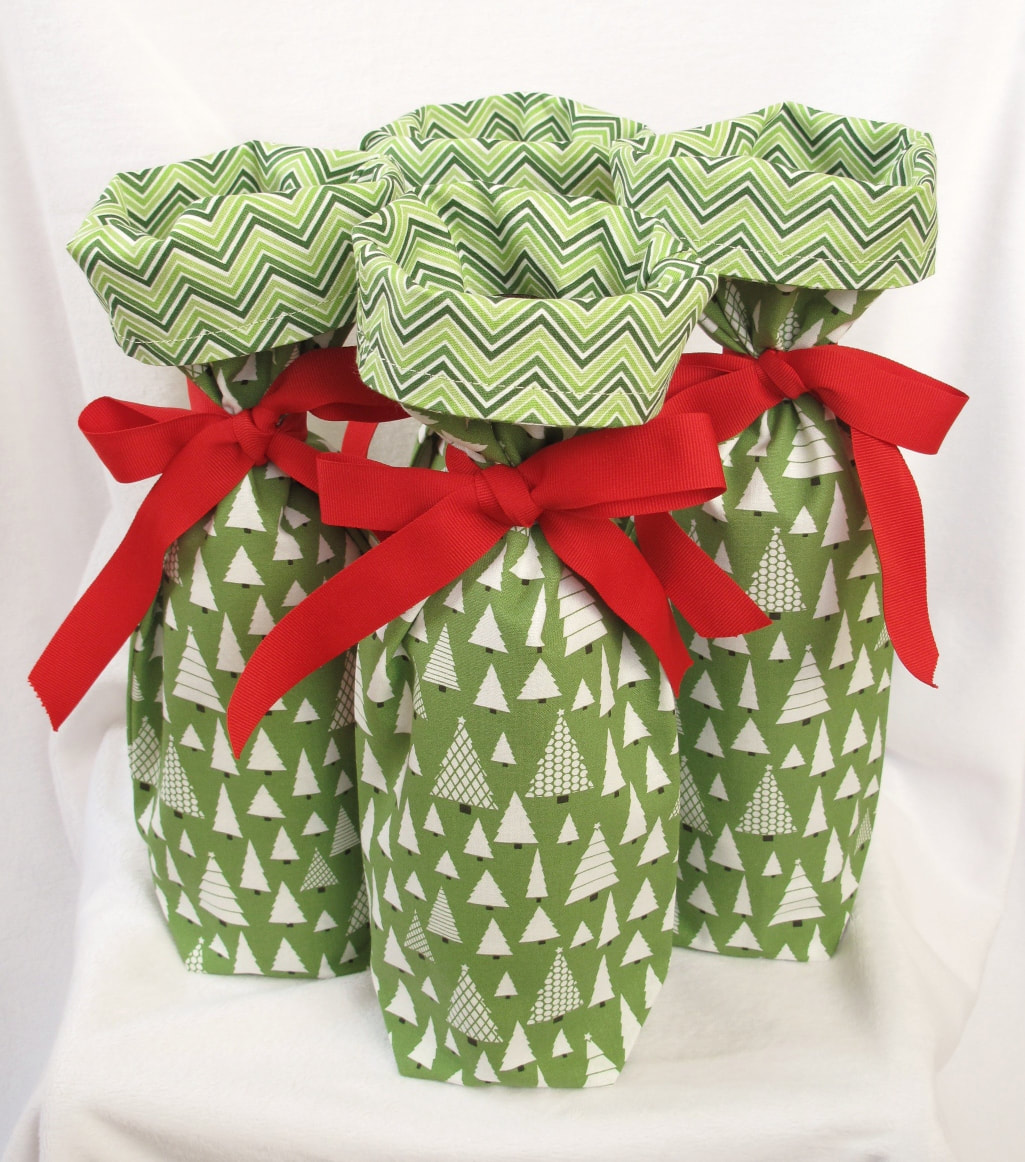
Back in November, 2010, 5 months after giving birth to my third child in less than two years (twins are part of that), I got online and created an Etsy store for myself. I decided on a name (I used to call all my kids "Goose"), and had my graphic-designer sister design me a logo. It was fun! I made bags, I took picture of them, posted them in my new store and then spent days hitting "refresh" to see how many views my store was getting. I had two kids in daycare and a baby at home who napped a lot and suddenly my love of sewing had a purpose. Fast forward a few years and I had learned a few things (like white backgrounds work better than others), had a few sales each month, and even had a fabric company send me an entire box of fabric for me to make up in to bags. They sent half-yard cut of all of the fabrics in all their collections. It was a crazy amount of fabric! I had done a bit of wholesale sales to local shops, had tried a craft fair (thanks to all of my parents' friends who came and bought bags, and an eye-roll goes out to the lady in the booth next door who told me that I'd sell a whole lot more if I lowered my prices a lot). I was definitely going outside of my comfort zone and was making an attempt to sell my fabric gift bags. Like many others in the quilting community, I discovered blogs and through those, the modern quilting community. I absolutely loved looking at all the beautiful quilt pics online. Somewhere in there I started my own blog/website, got a Facebook page and joined Flickr...and then Instagram. I learned that people would get together for sewing weekends (retreats) and I decided to try one of those - and it was great! At that first retreat a met a few people who have become dear close friends. My sewing habit has taught me a lot of things and has taken me to new places. 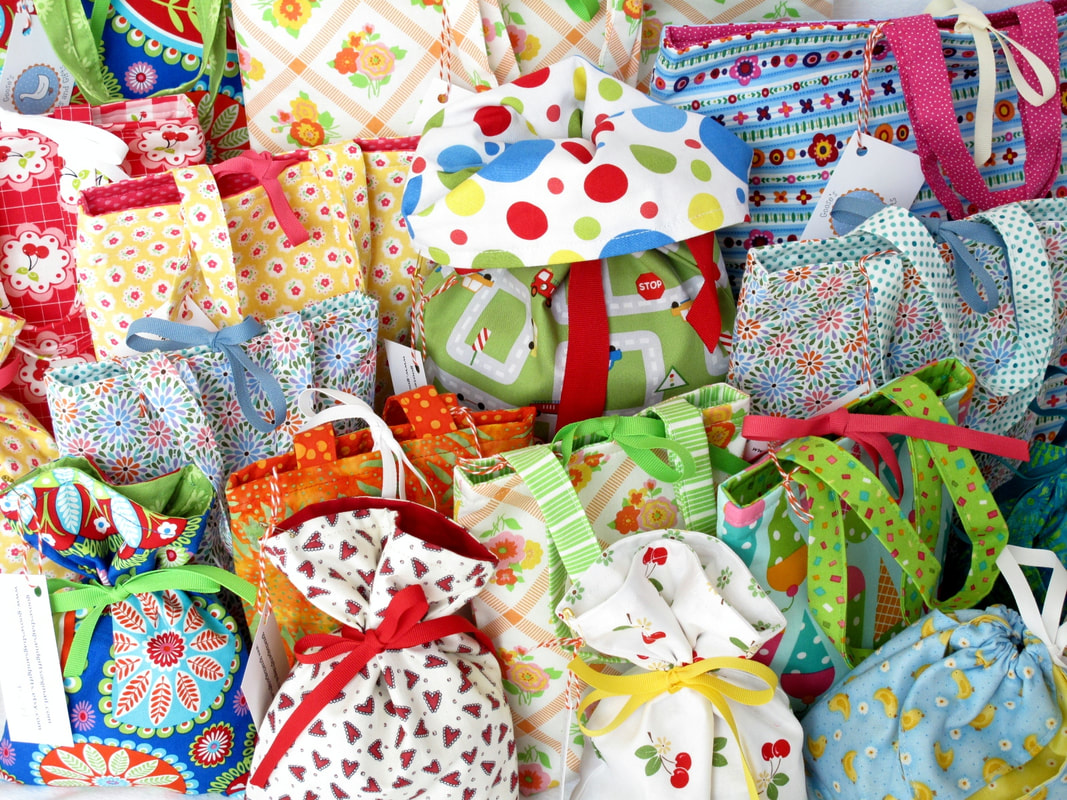 But now things are different. Last year I went back to work part-time and my free time really decreased (sewing time really). After limping along for the year struggling to take care of the house & myself, in addition to sewing, this November I decided I was DONE. Things had to simplify. I no longer needed to be reminded to renew Etsy listings for things that hadn't sold in a long long time. I no longer needed to try to remember to keep track of fabric expenses and sales...and pay the darn sales tax every January. No more trying to get great product photos to post on the website...no more hours of photo-editing and post-editing to try to get it just right so hundreds of people would find my bags on Etsy (over the hundreds of other reusable fabric bags posted there).
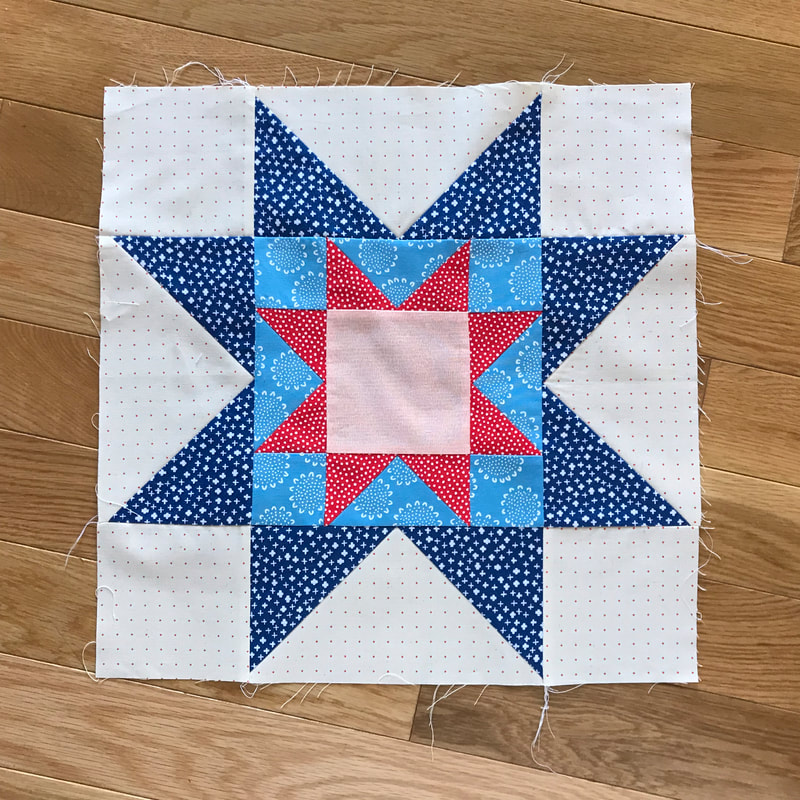
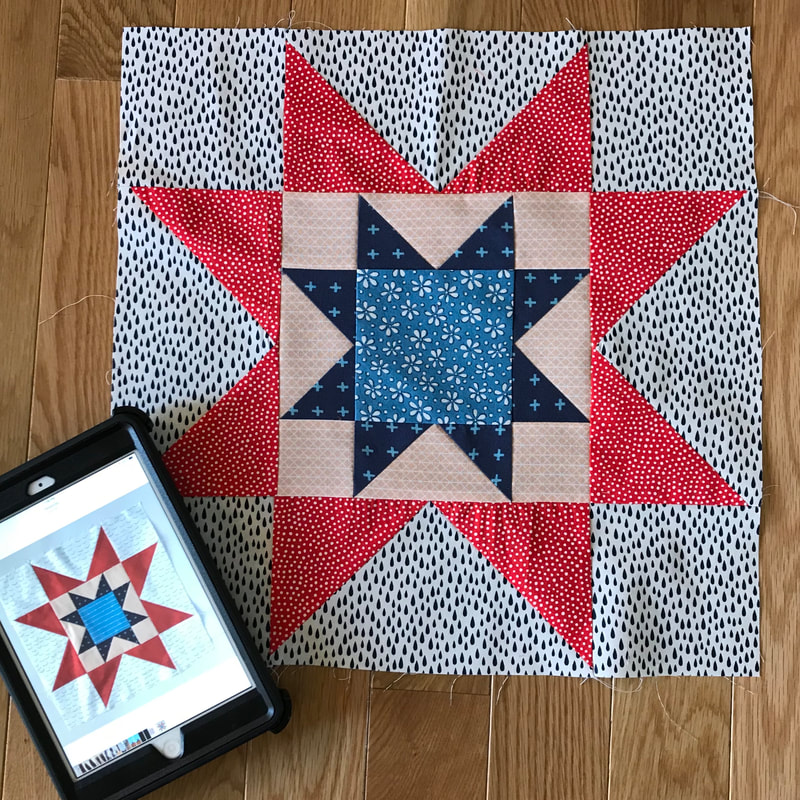
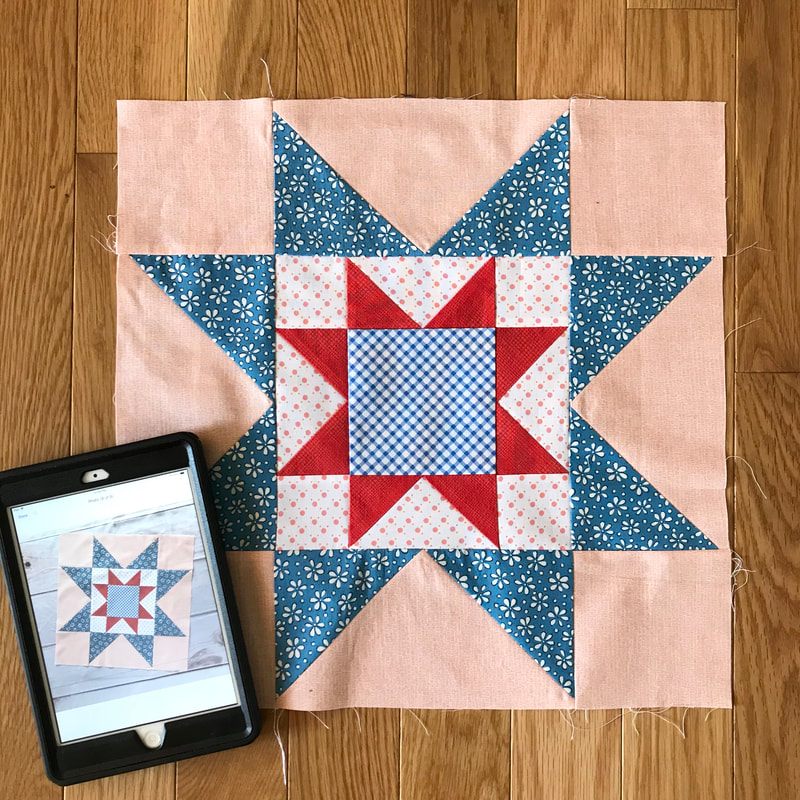
So for now the store is still there, but nothing is listed in it. If anyone ever wants to commission a quilt feel free to reach out - I do enjoy making quilts for people. Now I plan to buy fabric and not keep the receipt, gift quilts left and right, and not worry about self-promotion. I'll continue to blog here to document my creations for posterity, and will be posting on Instagram. If you were one of the 270 people who bought something from my store over the last decade - thank you! 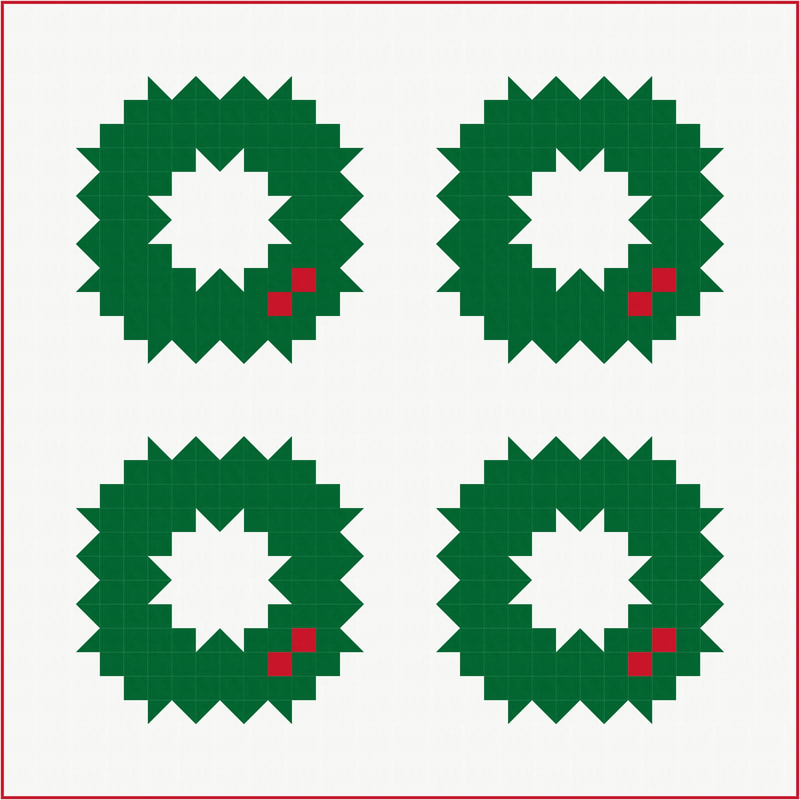 Happy weekend everyone! This feels like the last normal weekend in December and maybe you have some time to make a Christmas quilt?? If so, read on and you'll find a link to download the FREE pattern for this version of my patchwork wreaths. But first let's talk a little bit my new quilt! When I first started playing with my patchwork wreath block, this layout (above) is how I envisioned the block being used, but I saw it as being made from scrappy 2 1/2" squares. I made a test block of the scrappy version (see below left), and then started on a solid version of the block, when a friend suggested that I make a mega-sized scrappy version of the block, and that ended up happening first. You can click here to read about the mega-block finished quilt, or see the finished product here. 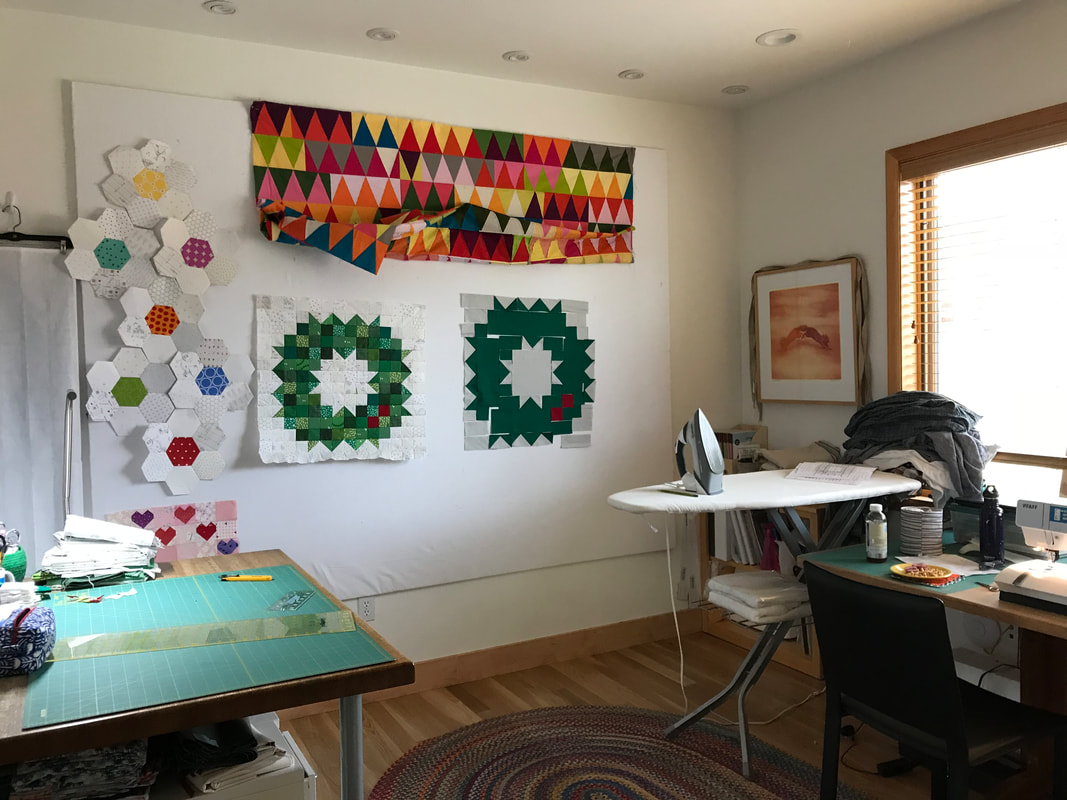 The original scrappy 28" block ironically was the first block made, and has yet to be made in to a quilt. On the right is the first block made from solid fabric, waiting to be sewn together. Regardless, after finishing the mega-block version of my wreath, I got back to work on the regular-sized solid blocks, making sure I noted cutting instructions, fabric requirements, and assembly directions as I went. 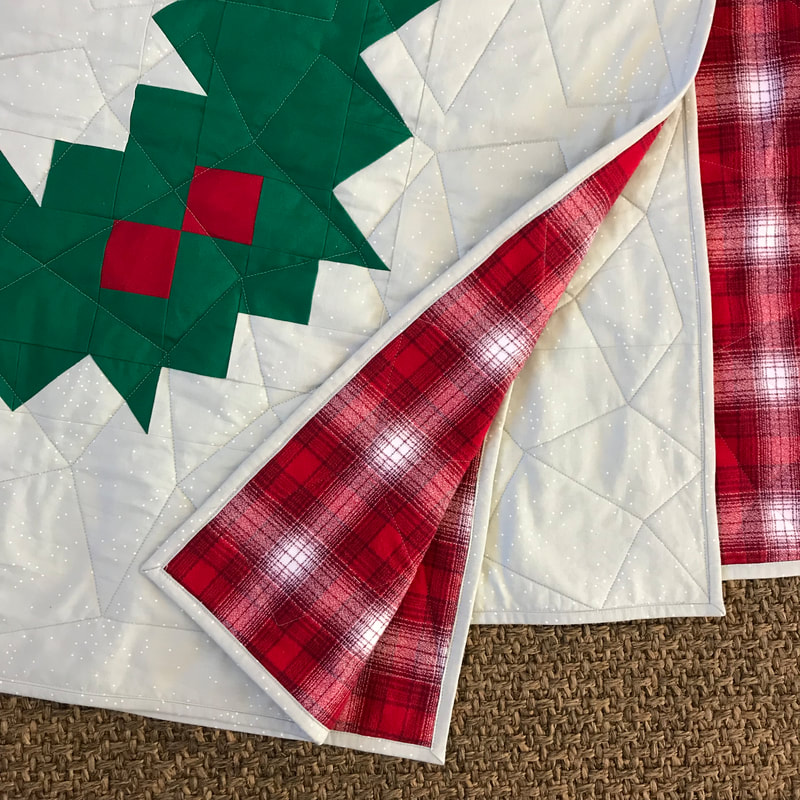 I used Robert Kaufman's Mammoth Flannel to back this quilt. I hadn't used their flannel before and was ordering online...assuming it would be fuzzy. I have to say that after pre-washing the backing, and washing it several times when the quilt was completed, it still isn't fuzzy. To me this fabric is more like homespun than flannel. It's thicker than regular quilting cotton, and is obviously woven, but is not fuzzy or soft. I am thrilled with the color and look of the backing though.  This quilt finishes at 70" square, has my usual "Soft and White" batting, and was quilted by my local long-arm quilter using a panto called "Fish Net" by Urban Elementz. I've compiled the instructions and have it available here to down load. I have not had this pattern "tested," so if you notice a mistake, please let me know and I'll make the correction and re-post. Please also note that these are just the directions for making 1 block, not the whole quilt. Some time in the future perhaps I'll put together directions for this actual quilt, but for now, if you'd like to make something similar to my quilt, you just need to add 6 1/2" sashing between the blocks, and then an 8 1/2" border. Click below to download the PDF directions for the solid block.
Thanks for stopping by, and if you make a quilt using this block, please tag it with #patchworkwreath so I can see your work! Happy Holidays! 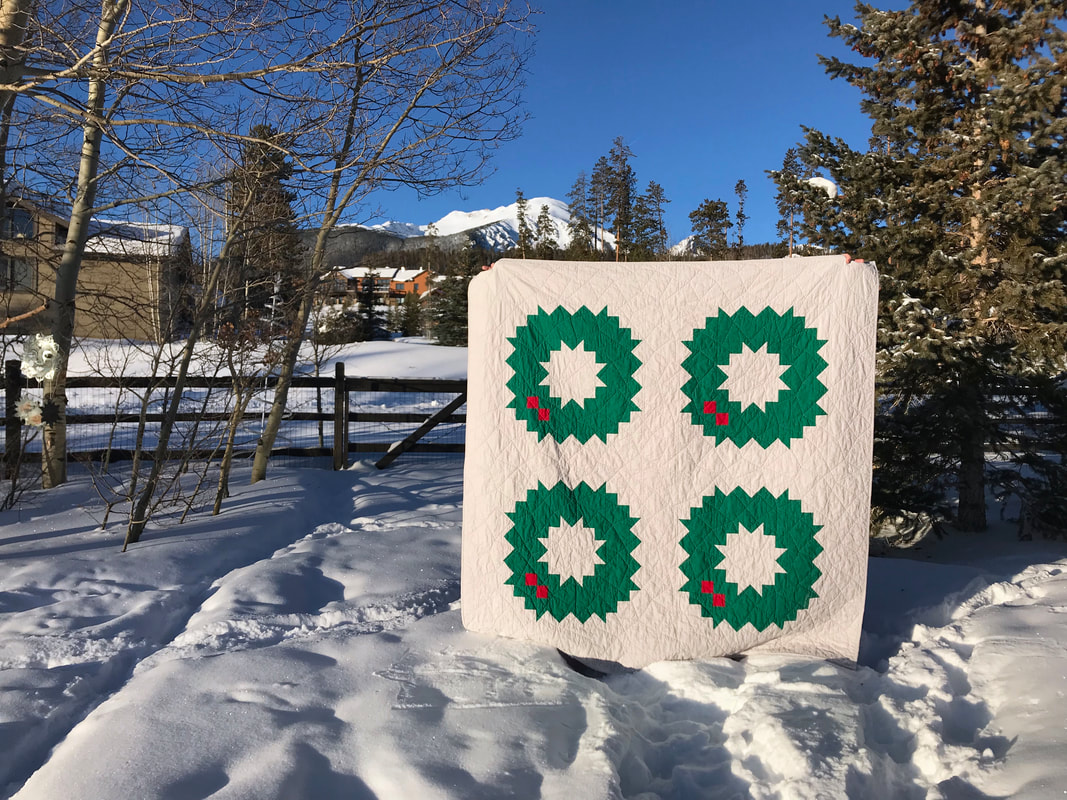 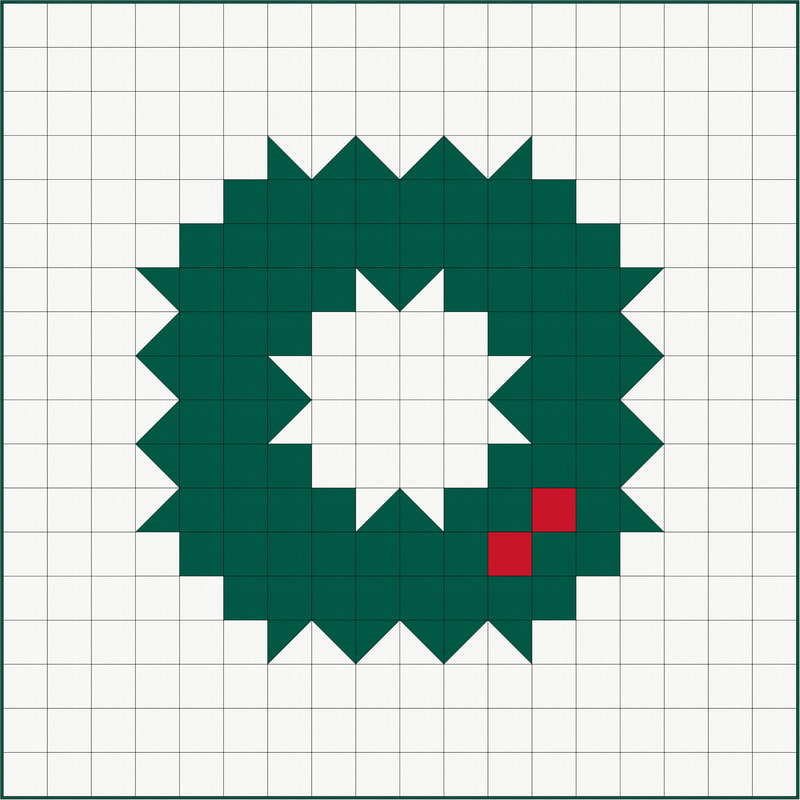 I'm having so much fun with the wreath block that I sketched a week ago or so. A friend suggested that I make a really big version of the wreath, so I did! Then more friends were interested in a pattern...so I did that too! Click below to download a PDF with directions for the mega block wreath quilt shown above:
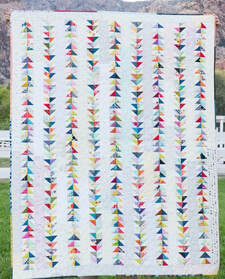
And the best part?? I have a new quilt top to hand off to my long-arm quilter and hopefully a new Christmas quilt for Christmas 2018. Fingers crossed. 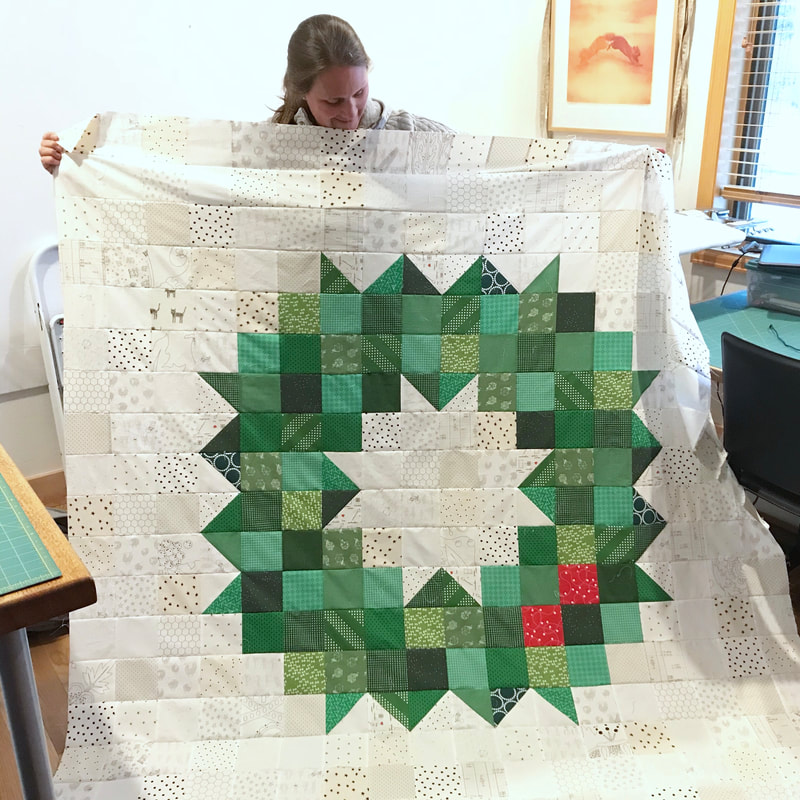 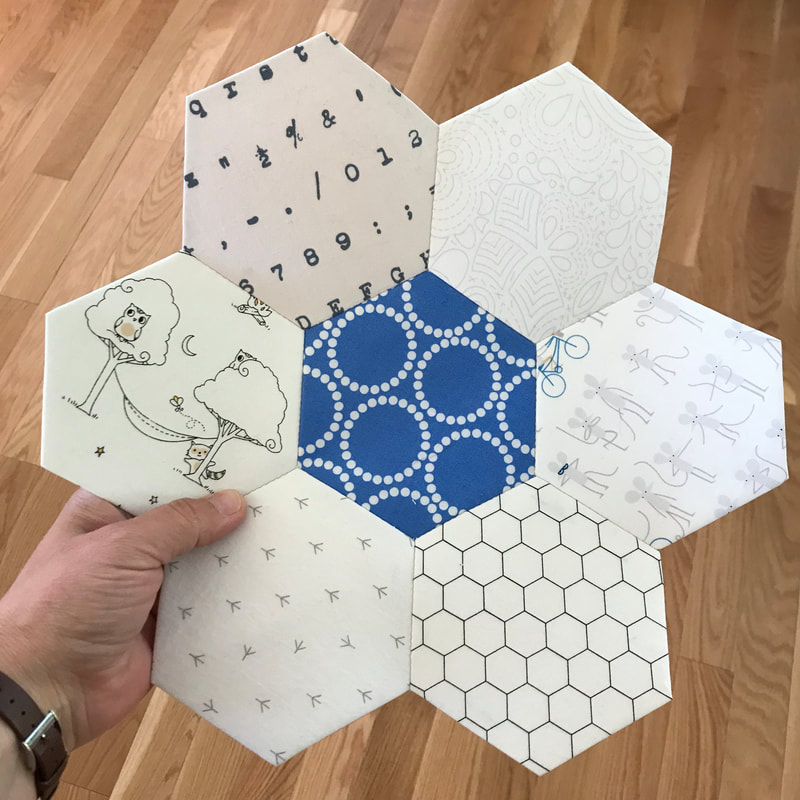 September has come and gone, and I had a pretty successful month sewing; including a couple of quilt finishes. I'm just going to jump right in to it: Works in Progress (WIP's): After I finished the memory quilts last month, I felt like working on a few more old WIP's, so I sewed together a bunch of medium-value red and white half-yards to make a backing for my scrapping flying geese quilt (below). And that's as far as I got on that one! Nothing like a big quilt needing to be basted to slow one down on that project. I also continue to stitch away on my next hexagon project. I'm still not committed to a design, but I'm enjoying sewing lots of low-volume fabrics together. (You can see my latest flower above.) 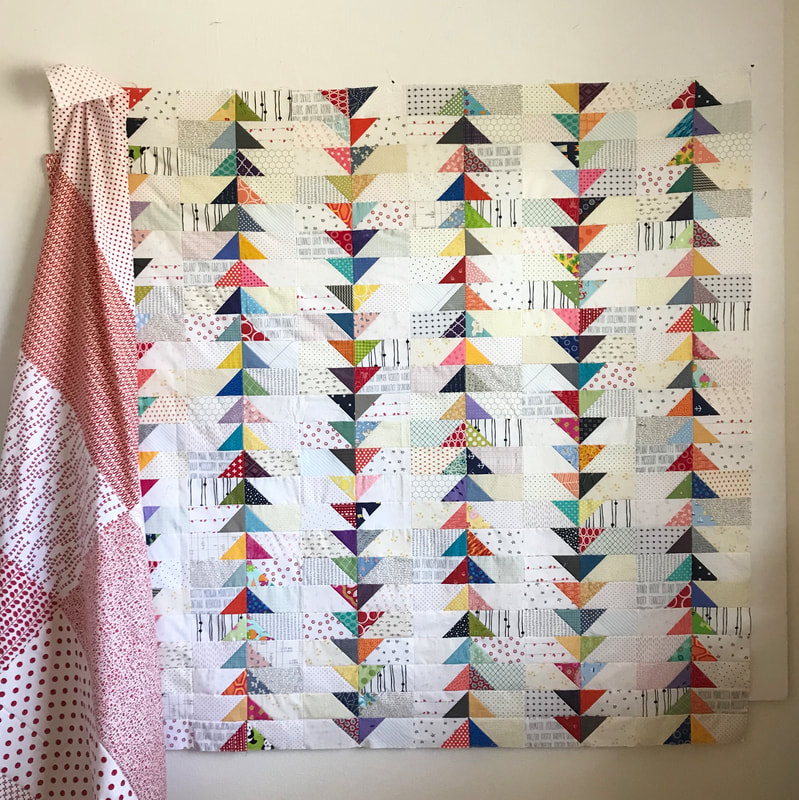 New Projects: This month I started and finished (!) a pumpkin quilt for fall. I made this pattern about the same time a year ago and really enjoyed how quickly it all went together. I had the quilt quilted by my local long-arm quilter and I love how it turned out. I tried so hard to make this one "fall themed" rather than specifically for Halloween, but in the end I went with some glow-in-the-dark cats for the backing... 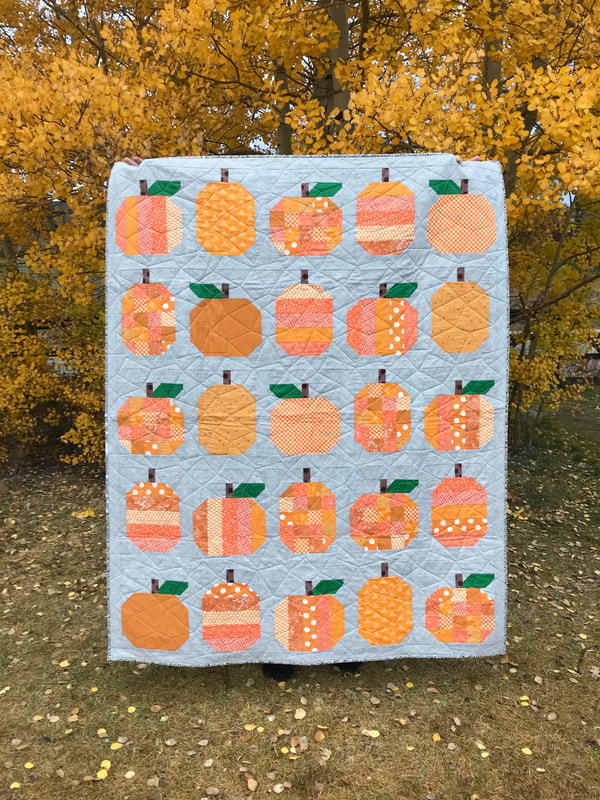 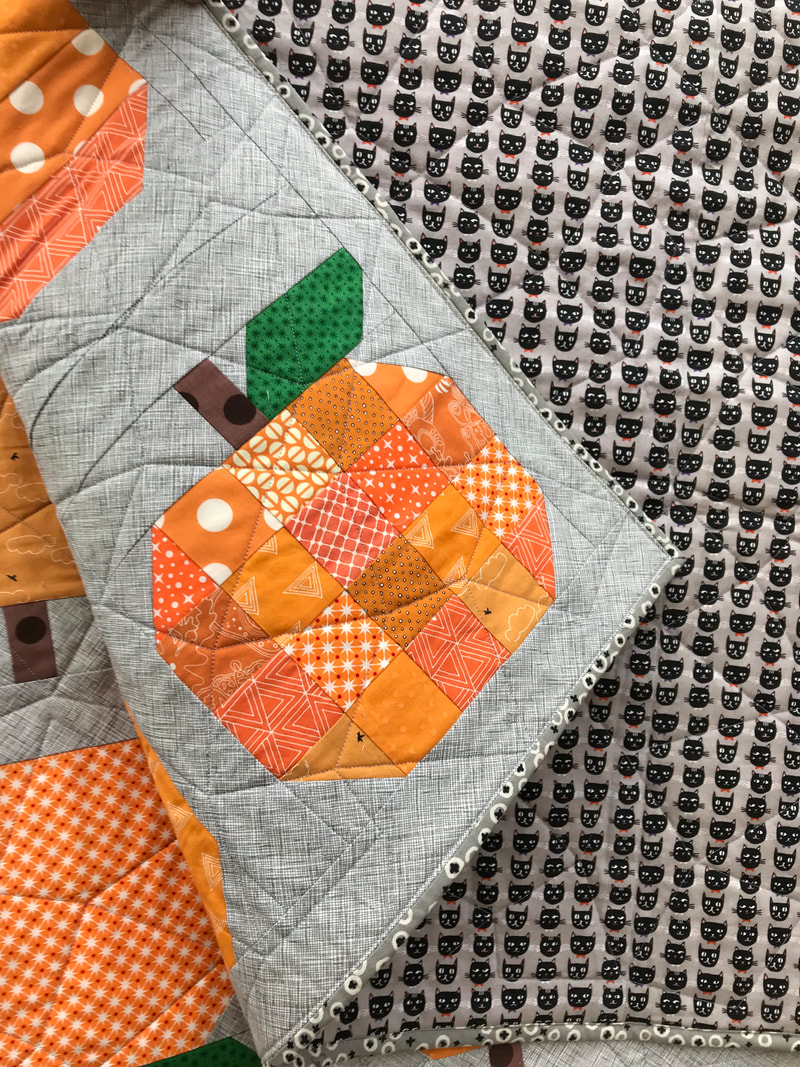 Finished Projects: As you may have read already, this month I finished the memory quilts for my cousin and aunt/uncle, along with a blue string baby quilt. You can read about those quilts here and here. I am pretty excited that I was able to finish 4 quilts this month. That maybe a new record for me (though some of those tops took a long time to make).
Traveling Bee Blocks: This month I remade the bee blocks that were stolen last month. For Steph's Norwegian quilt, I did my best to recreate the original two star-in-a-star blocks, and then I made a third. I also remade Kayla's blocks, but forgot to get their picture before I shipped them off. These blocks mark the last blocks for round 2 of our traveling quilt bee. Time to think about what I'd love for round 3!
That's all for projects this month. I made a lot of stuff, right? But I also had an amazing fabric-buying opportunity this month. Heather Ross re-released her Lightening Bugs collection (shown below), and I was lucky enough to buy a few of the bundles of fabric. I can't remember when I bought the fabric, but it arrived this month! The 32 yards I bought from Heather, combined with fabric to back the pumpkin quilt, plus buying some fabrics that I needed for other specific projects made for a large fabric-buying month. Fabric Standings Fabric Purchased: 50 yards Fabric Used: 48.25 yards Net for the Month: 1.75 yards UP Net for the Year: 47 yards UP  In all, I'm up 47 yards for the year. I think I can go ahead now and say that I'm not going to end the year negative (using more than I bought). But I really am not sure what October and November will bring. And who has time to sew in December?? I'm ok with it though. It's been an interesting activity to track my fabric purchases vs. usage. I'm not sure if I'll do it for next year, but I am looking forward to comparing 2018 to 2017. (I think I did better at using up fabric last year.)
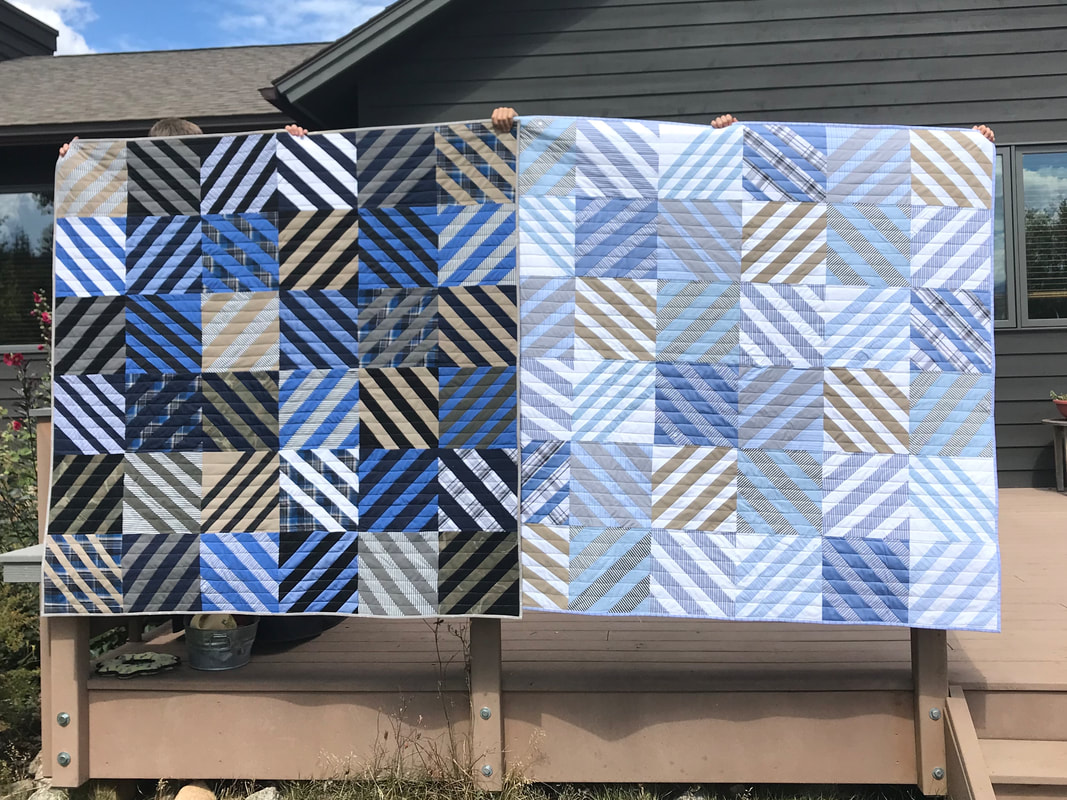
Happy Fall to Everyone! Here's to cool rainy days with lots of sewing.  For the past 10 months I've been working on my first set of memory quilts. My cousin passed away unexpectedly last December and I offered to make my aunt and uncle and his sister a memory quilt from my cousin's old shirts, shorts and pants (no t-shirts!). I wanted the quilts to look like traditional pieced quilts, not what I had always seen done for memory quilts - with large squares of fabric from shirts sewn together in a 1-square pattern (click here to see what I'm talking about). I had see this quilt on Instagram, and liked the idea of making a string quilt. I thought it would be a way to mix a lot of fabrics successfully, but wasn't sure how I wanted to construct the blocks. The "Blue Strings" baby quilt that I just blogged about was my first attempt at constructing string blocks. The primary color baby string quilt was my second attempt (though it's still waiting to be quilted).
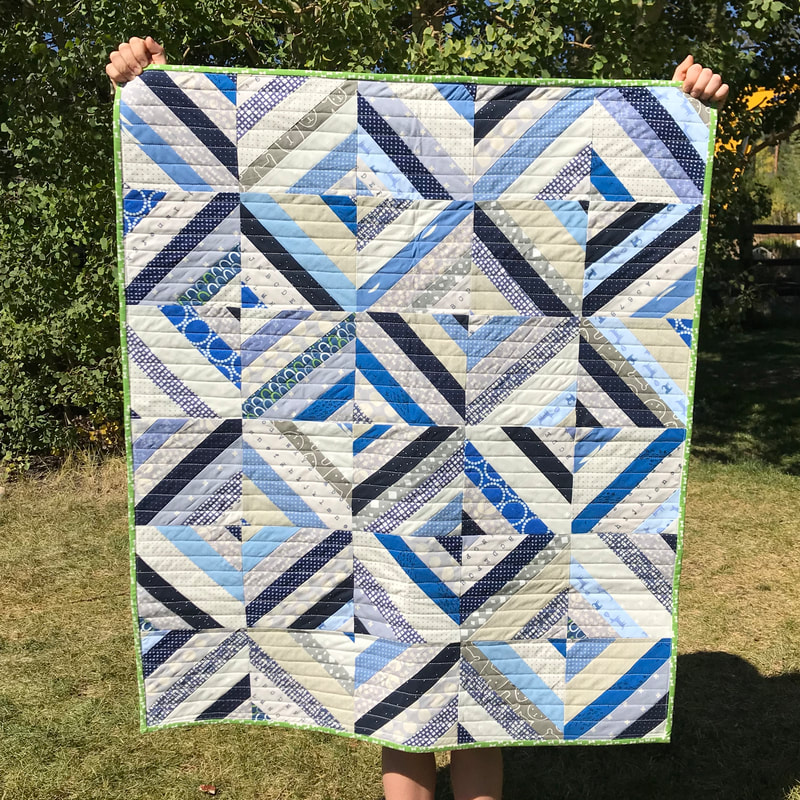
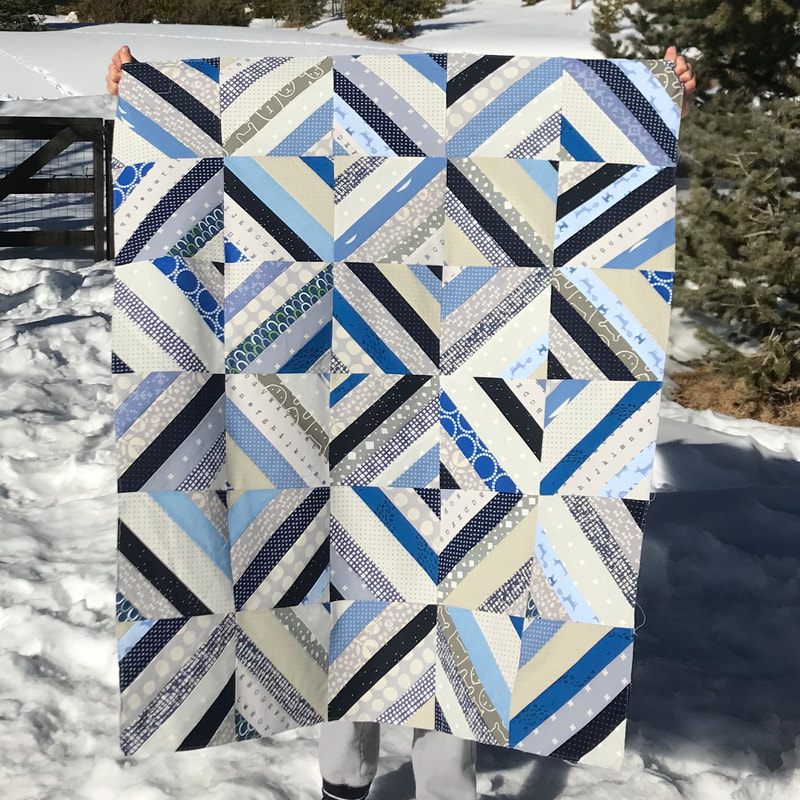
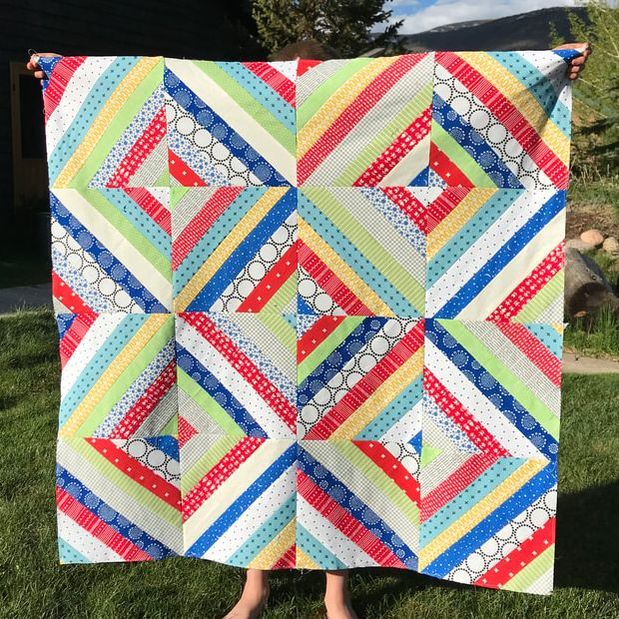
The two different construction methods that I used worked well enough, but after making these 2 quilts, I decided that with my cousins shirts I didn't want to mix all the different fabrics in one block and I didn't want to have to tear out foundation paper. In the end, I didn't use either method that I tested, and instead tried something new entirely, and I loved it. 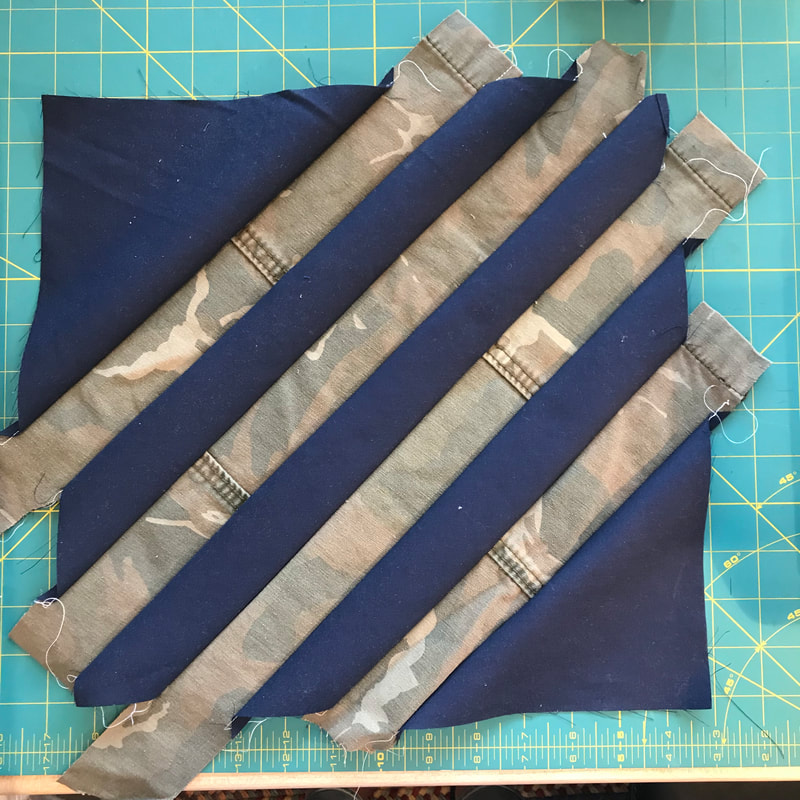 For my blocks, I cut apart the shirts and pants/shorts to make them in to the biggest flattest pieces that I could. I also left pockets and buttons where I could. Next, I cut 12 1/2" squares from the biggest pieces I had (the backs and arms of shirts and the legs of pants), and cut the rest of the smaller pieces in to strips of varying widths (from 1 1/4" - 2 3/4"). Once I had everything cut and could see what I had to work with, I separated the large 12 1/2" squares in to a set of dark squares for my aunt and uncle's quilt in Wisconsin, and a set of lighter squares for my cousin's quilt in Florida. Then I went to work using the "slice and insert" method - slicing the 12 1/2" square and sewing in a strip of a contrasting fabric. I opted to use 1 fabric for all the inserted strips in each block, and tried to keep things consistent. For example, I used all the strips from the camo shorts in navy blue 12 1/2" blocks, and strips from the black and white shirt in light blue squares, etc. When I had inserted 4 strips in each square piece of fabric, I trimmed the block down to 10 1/2" square. 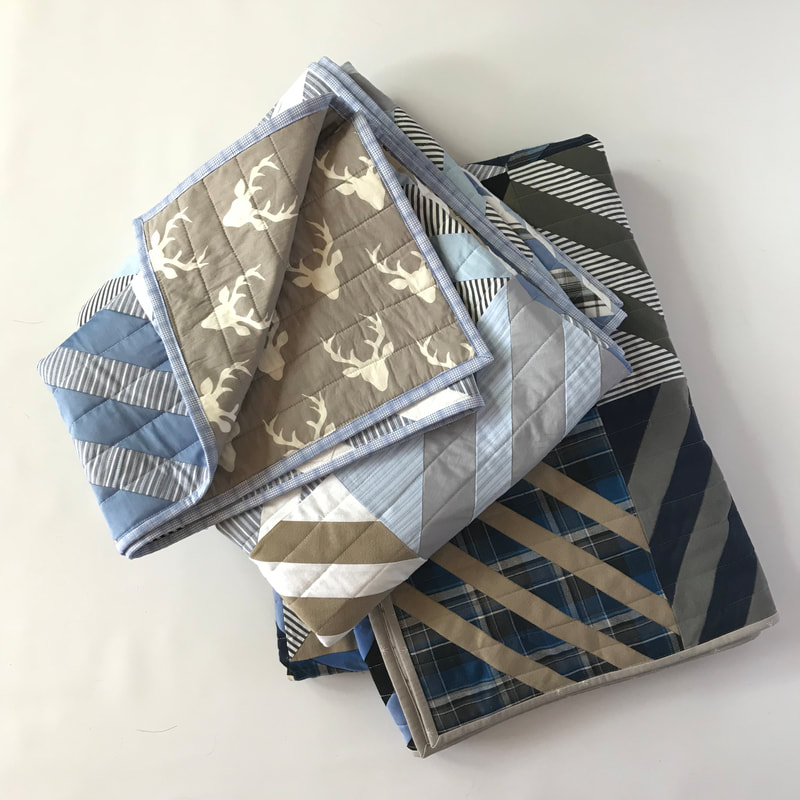 I backed both of the quilts with the same deer head print from Art Gallery fabrics (Hello Bear Buck), and quilted them with 1 1/2" spaced straight lines. Since some of the clothing fabrics are heavier than quilting cotton, the quilts are also a little heavier than my normal quilts, but have a lovely drape and feel to them. I was worried about incorporating things like Carhartt canvas in the quilts, but actually found that the canvas was one of my favorite fabrics to work with - the more slippery synthetic shirt fabric not so much. I am thrilled with how these "memory" quilts turned out, and with the fact that people don't immediately recognize that the fabrics in the quilts are old shirts and pants. I think that they look like great quilts in themselves, and have special meaning to the people who will be using them. Quilt Stats: Both quilts finish at roughly 60" square (using a 6x6 layout and 36 blocks each). Blocks finish at 10" x 10" For pictures of these quilts in progress, please check out #quiltsfrombeau  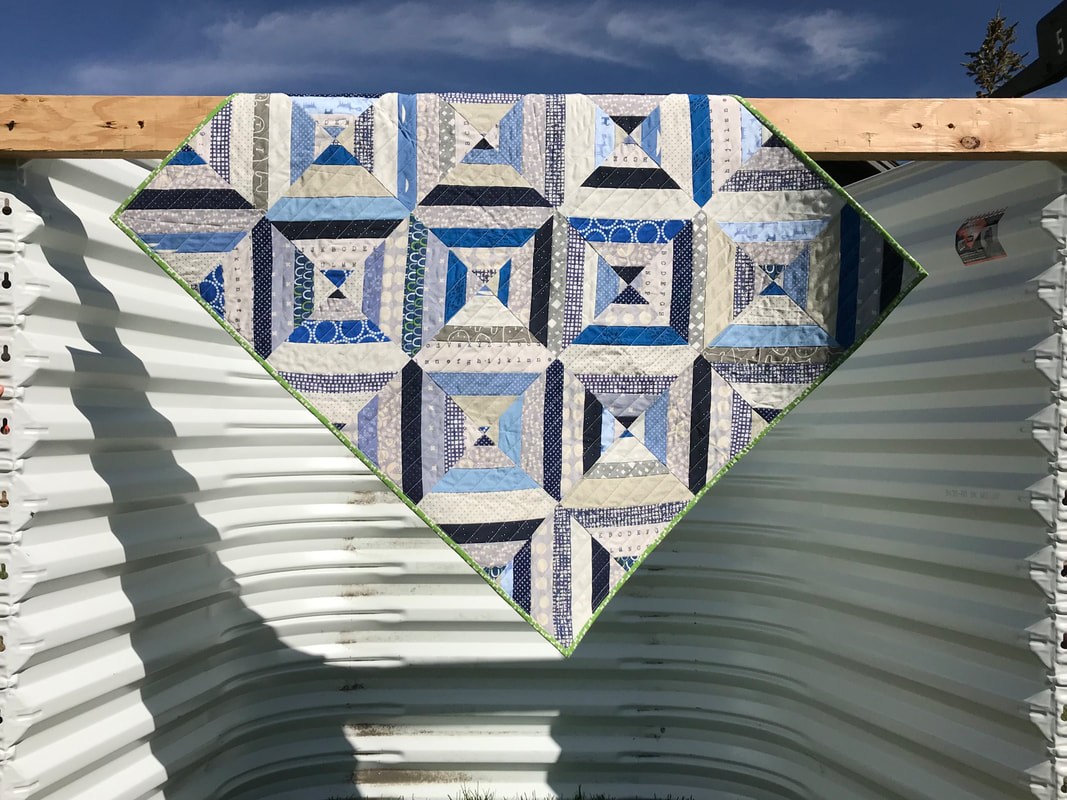 I feel like I haven't actually finished a quilt in a long long time, and it feels good. This little guy was made for two reasons: the first was to try out piecing a "string" quilt using a paper tear-away foundation, and the second was to make a quilt that I could back with this particular fabric (see pic below). 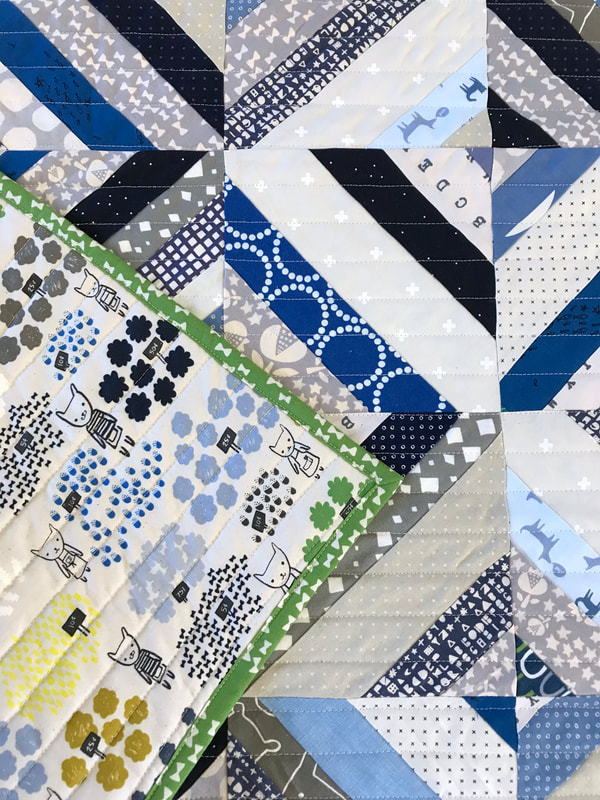 I had fun pulling all these grays and blues from my fabric stash - and even had the green binding fabric on hand already. My friends tease me that I've made a lot of blue quilts lately (here, here, here, here and here), but I still love the cooling, calming feeling I get when I look at blues and grays together.  Quilt Statistics:
This quilt finishes at roughly 32" by 40" and I used blocks that finished at 6.5" square I quilted it myself with straight lines spaced 1" apart, and I used my usual Warm & White batting. I didn't love the paper foundation method that I used for this quilt - I'm never a huge fan of pulling the papers when the blocks are made (or when the quilt top is assembled). So for my memory quilts, I opted to go another way for construction. More on that soon! |
Archives
May 2023
 |
|||||||||||||||||||

 RSS Feed