- About Me
- Blog
- Commissions
-
Tutorials
- Solid HRT Quilt
- Solid HST Quilt
- Going Places Quilt Tutorial
- Star-in-a-Star Baby Quilt Tutorial
- Scrappy Inner Star Quilt Pattern
- Inner Star Quilt Pattern
- HST Chaos
- Scrappy Goose Quilt
- Scrappy Patchwork Wreath Quilt & Block - Reg Size
- Solid Wreath Block
- Quilt Show Ribbon Tutorial
- Double Bear Paw Block
- Improv Sticks Border
- Wreath Mega Block Quilt
- Contact Me
Solid HST Quilt
|
Quilt Details
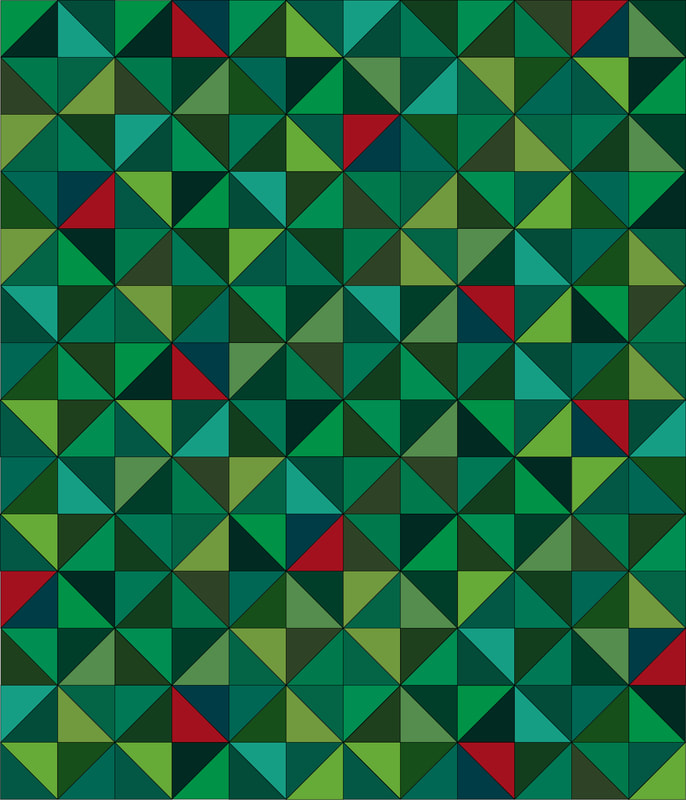
This quilt is made of half-square triangle (HST) blocks, oriented so that they form diamonds. The way that I make this quilt, you will be required to layout the entire quilt before beginning to sew it together. This is not a quilt that I assembled in sections. The quilt finishes at 60” by 72”. You will use ¼” inseam for assembly. Fabric Requirements 19 fatquarters (FQ) in shades of green 1 red FQ Please click the link below to get a pdf version of this pattern.
| |||||||
I used the following Kona Cotton fabrics for this quilt:
|
Balsam
Basil Blue Grass Clover Everglade Fern Forest |
Grass Green
Grasshopper HollyJ ungle Juniper Kelly Kiwi |
Leprechaun
Palm Pesto Spruce Willow Rich Red |
|
Cutting instructions
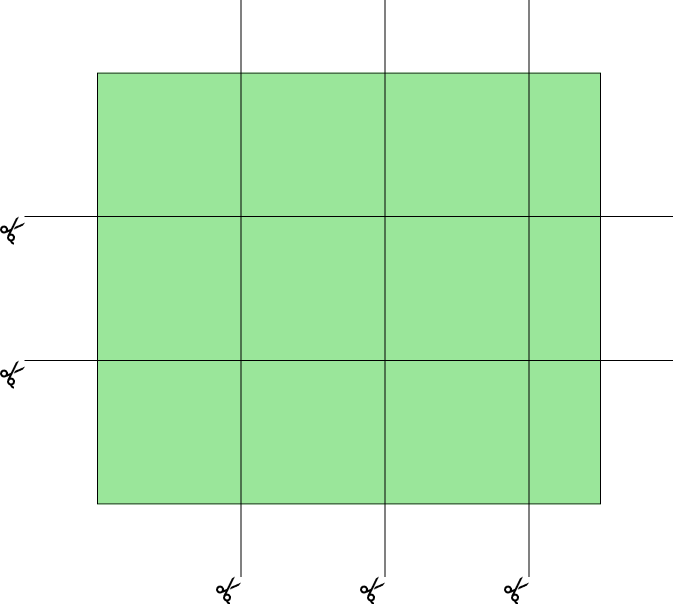
Set aside one green FQ and the red FQ. From the remaining green FQ, create 9 pairs of fabrics. These fabric combinations will be used to create your half-square triangle blocks (HST). When creating your pairs, keep contrast in mind: you want to be able to distinguish between the two fabrics in a pair. I paired one dark fabric with one that was lighter. **In order to make the quilt layout easier, after cutting, you are going to want to keep like fabric pairs together thru the sewing, cutting, pressing & trimming process. Also, this quilt math gives you a few extra green HST blocks to give you a little more wiggle room in the layout process.** Once you have your fabric pairs, lay out three of your FQ pairs one on top of the other (for a stack of 6 pieces of fabric total). From your stack of fabric, cut three strips 6” x 20” (or the width of the FQ). Sub-cut the strips into nine 6” x 6” squares. Separate the squares by color pair. Repeat until you have cut all 9 pairs of fabrics. |
|
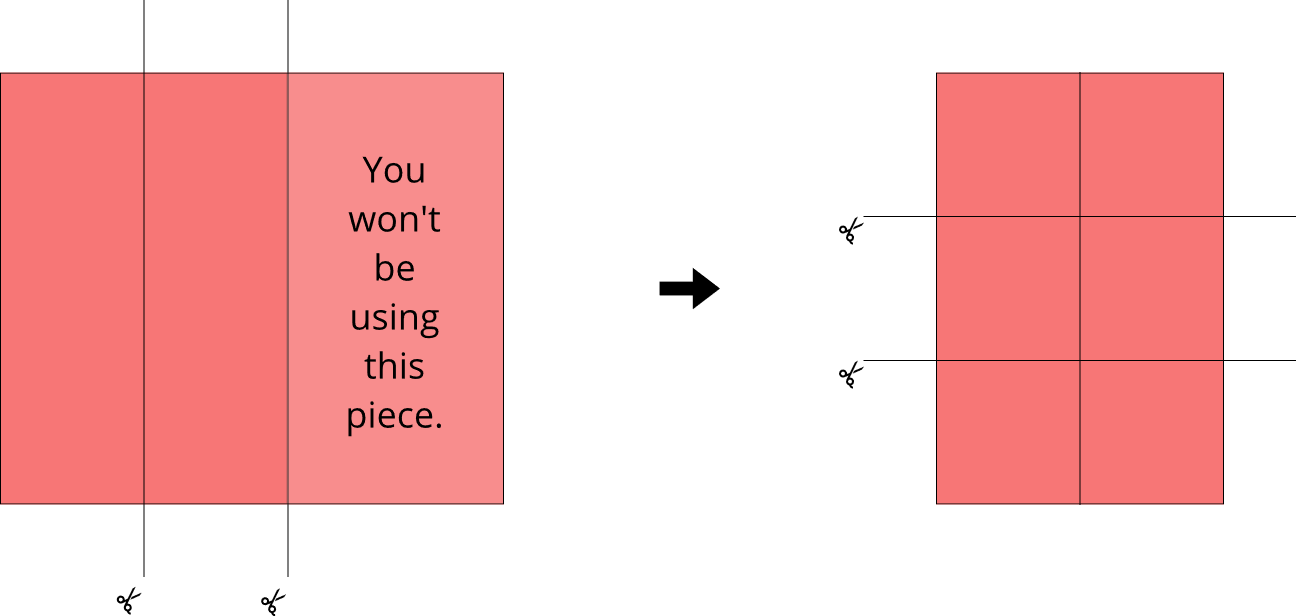
From your red FQ and the last green FQ you will only need to cut six pairs of 6” squares. Because of this you will have some excess fabric. Lay your fabrics on top of each other and cut two 6” strips the short way on your FQ stack (strip will be 6” x 18”), and sub cut the strips into in to 6” squares.
|
Assembling HST Blocks
Taking a fabric pair, on the lighter fabric, draw a line diagonally from one corner to the opposite corner.
Stitch ¼” away from the line on both sides. Repeat for all your fabric pairs. Once all your pairs are sewn together, cut them apart on the diagonal line and then press the blocks. For this project you are going to want to be consistent and always press to the darker fabric. This will help you nest seams later when you are assembling your quilt top.
The last step in making your HST blocks is to trim them all to 5 ½” x 5 1/2”.
You should now have 12 blocks that contain red, and 162 blocks that are all green. This gives you 6 extra blocks to work with.
You should now have 12 blocks that contain red, and 162 blocks that are all green. This gives you 6 extra blocks to work with.
Laying Out Your Quilt
For this next part, I have created some Instagram stories that are saved in my highlights so you have a visual.
Please visit @handmademyrth if you have any questions.
For this next part, I have created some Instagram stories that are saved in my highlights so you have a visual.
Please visit @handmademyrth if you have any questions.
|
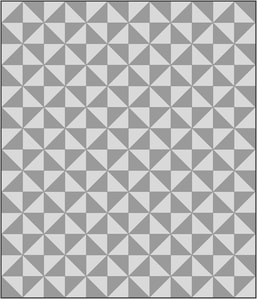
You are going to layout your HST blocks in a diamond formation. I have illustrated this with the 2-color diagram to the left.
However, we are going to lay out our blocks using a really quick method. From your finished blocks, you are now going to create 18 piles that each contain one of every fabric combination. This should hopefully be easy if you’ve kept the blocks with same fabrics together. Once all of them are divided into piles, you will have 12 piles that contain 10 blocks, and 6 that only contain 9 blocks. *You only have 12 red HST blocks – that is why some of the piles have fewer blocks. |
|
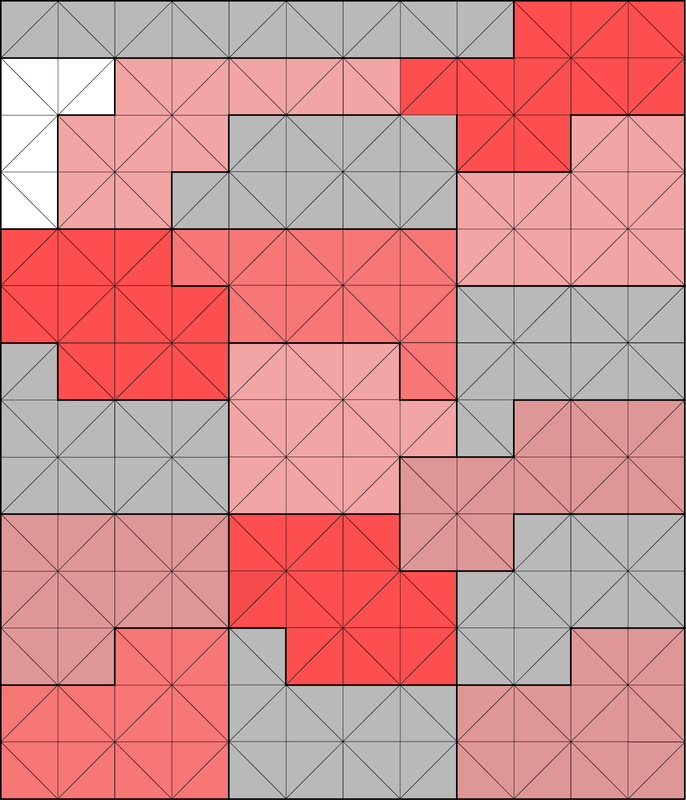
You are going to lay the quilt out in sections, using one pile per section. This will ensure that you have a somewhat equal distribution of colors throughout the entire quilt. To the right, I have illustrated what I mean by laying the quilt out in sections. The red areas indicate a section where you will be laying out squares from a pile that contains one red HST. The gray areas indicate a section where you will be laying out squares from a pile that does not contain a red HST.
Taking the first pile, lay out the blocks. You will be laying them out to form a diamond pattern that has alternating dark and light sections that make diamonds. Using the next pile, lay out the adjacent section. Work your way thru the piles until you have laid out blocks in a 12 x 14 grid. At the end, you will need only 4 blocks from your last pile of 10 blocks. Choose the ones that you think have the best color combinations with the surrounding blocks and put aside the last 6 blocks. This is represented by the white squares on the diagram. |
At this point, I usually take a black and white photo of my quilt using a filter on my phone. This helps to check for equal distribution of light and dark areas or blocks throughout the quilt top.
Assembling the Quilt Top
Once you are satisfied with the layout, you can begin to sew the top together. I use the “web-piecing” method to assemble the entire top, but you are welcome to assemble the quilt in rows, columns, or sections as you like. If you are not familiar with web-piecing, I have highlights on my Instagram account that go over the method.
If you make a quilt using this pattern, please share it on social media with the hashtag #SolidHSTQuilt I would also love it if you tagged me so I can see your work!
Thanks for stopping by!
handmademyrth@gmail.com

